
Today, Creative Team Member, Joan, is sharing her Sky Photo Editing Technique.
This tutorial is conducted in Adobe Photoshop.
Sky Photo Editing Technique
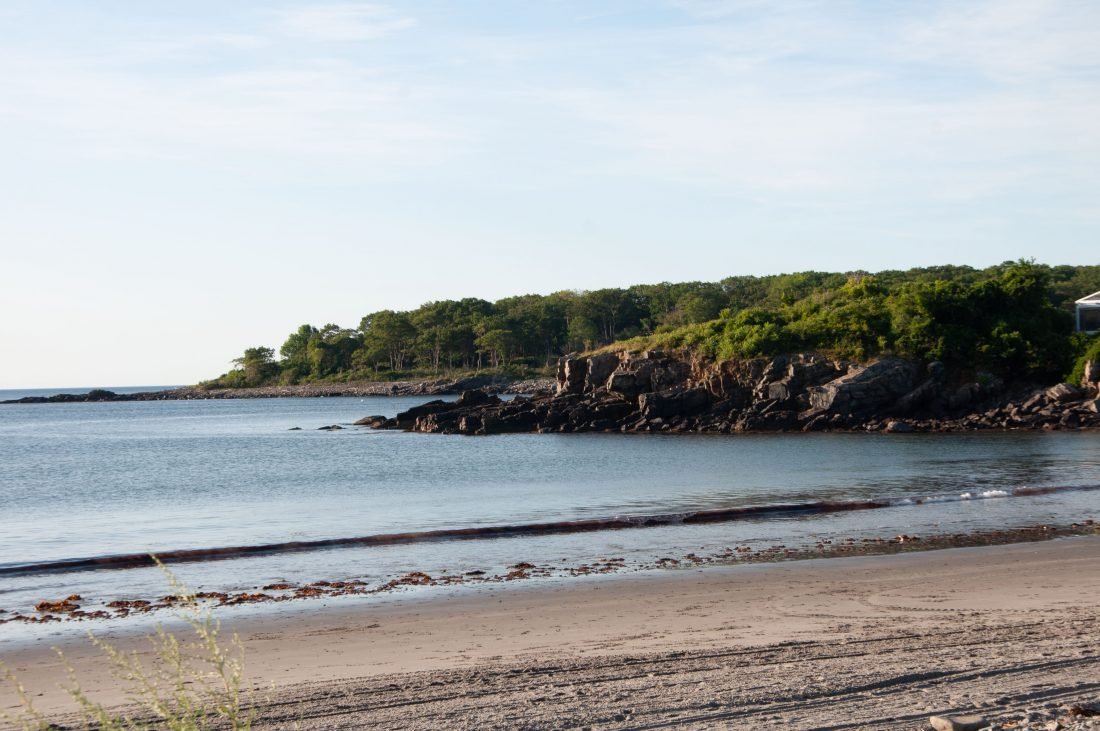 Changing the sky in a landscape will elevate your photo.
- You can transform a boring day time sky to a more dramatic night sky, a sunrise with pinks and purples or sunset with brilliant yellows and oranges.
- This technique is also helpful for converting a daytime photo into a night time scene, which is especially helpful when you have a specific story to tell.
1. Convert to a Night Sky
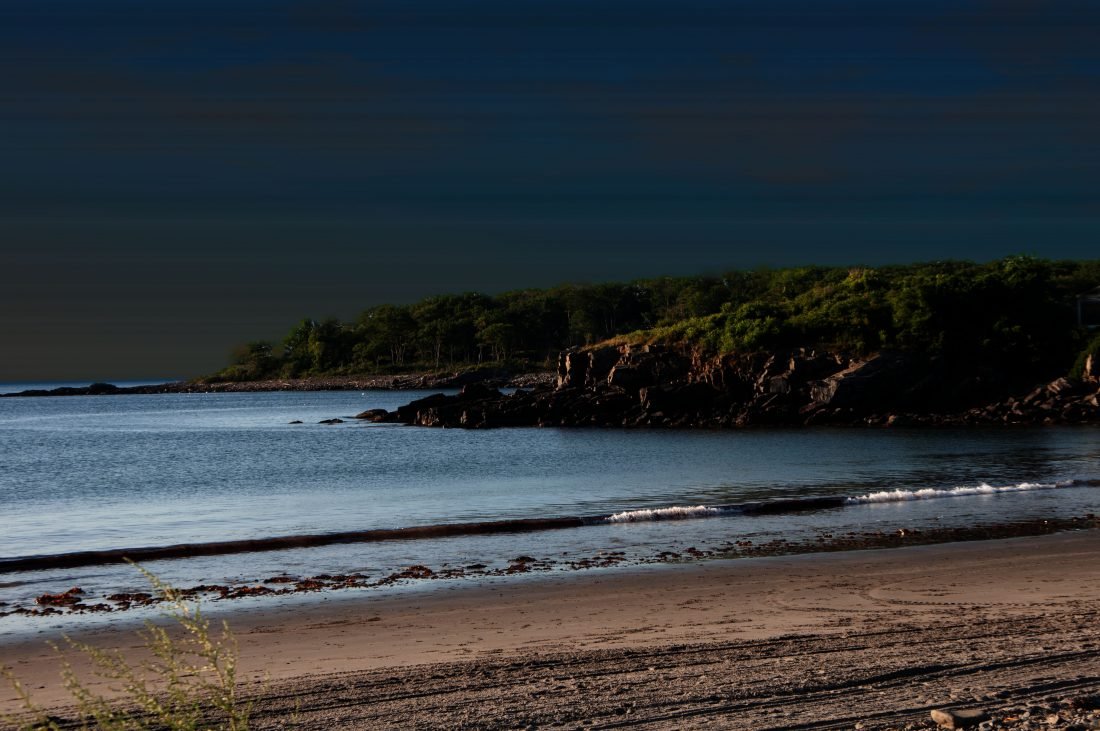
Darken your photo using a Multiply Blending Mode.
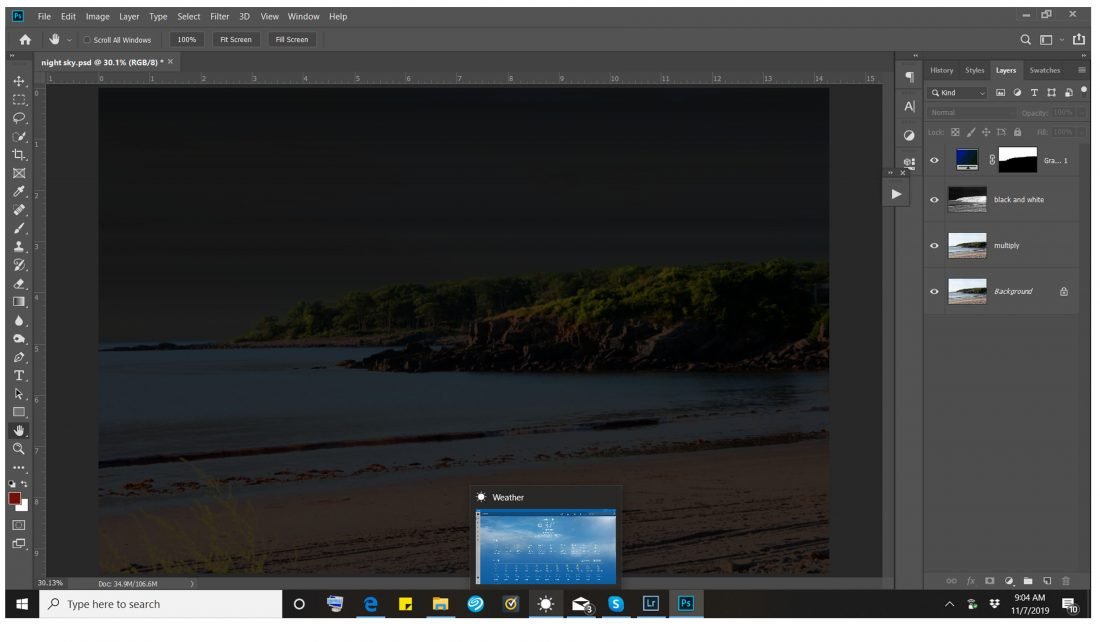
- Open your photo in Photoshop and duplicate the image via Image> Duplicate.
- Close the original photo.
- Duplicate the Background Layer of the background by pressing CMD/CTRL> J keys.
- Set the Blending Mode to Multiply to darken the image.
- Duplicate this layer via Layer> Duplicate.
- Press CMD/CTRL> I to convert the duplicate layer (copy) to Black and White.
- Rename this layer to ‘Black and White.’
- Set the Blending Mode to Multiply.
Note/Tip. This darkens the whole photo – You can add a moon element using a FotoGlow element and modify the effect by adjusting the visibility of layer or reducing the Opacity.
Create and modify a Gradient layer.
- Go to Layer> New Fill Layer> Gradient and click OK.
- Set the Style to Linear, the Angle to 90, the Scale to 100.
- Do NOT check Reverse or Dither, but ensure you DO have Align with Layer checked.
- Double -click on the Gradient to open the Gradient Editor.
- Change the Gradient Type to Noise and Roughness to 50%, and with Color Mode set to RGB, move the Sliders to the RIGHT.
Note/Tip. The RED needs to go almost all the way, the GREEN just slightly less, while the BLUE should be moved just less than 1/3 of the way – Experiment with the sliders to discover what works best for your process and preference. You can adjust then at any time by Double-Clicking on the Gradient to reopen the dialog box.
Apply the Gradient layer the sky ONLY.
- Select the sky area of the photo using the Magic Wand Tool.
- If the whole sky doesn’t select the first time, select the Add to Selection option and Click in the sky area until the sky has been selected in its entirety.
- Goo to Select> Modify> Expand and enter a 10 px value.
- Repeat this step, but this time use Feather, instead of Expand, and enter a 5 px value.
2. Convert to Sunrise
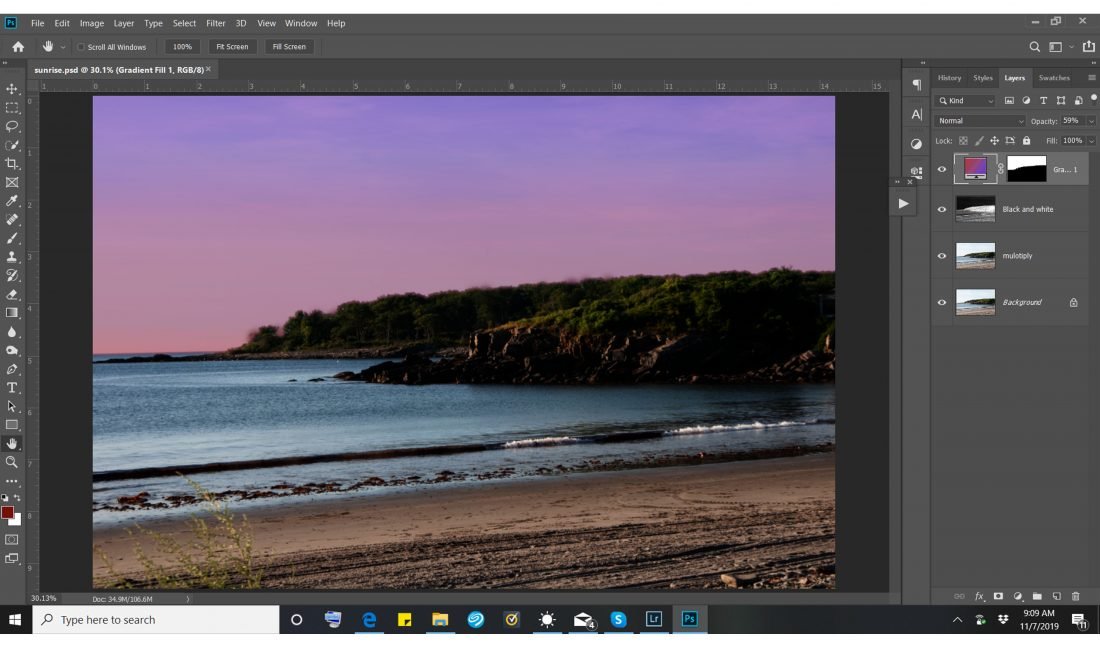 Repeat the steps above, changing the gradient colors, to adjust the sky.
- Darken your photo using a Multiply Blending Mode and duplicate layers.
- Double-click on the Gradient Fill icon at the bottom of the Layers Panel and select the Gradient option.
- Change the Roughness to about 16%.
- Experiment by moving the three Color Sliders to yield the hues in your preferred sunrise.
- Adjust the Opacity of BOTH the Gradient and the Black and White layers to achieve best results.
3. Convert to Sunset
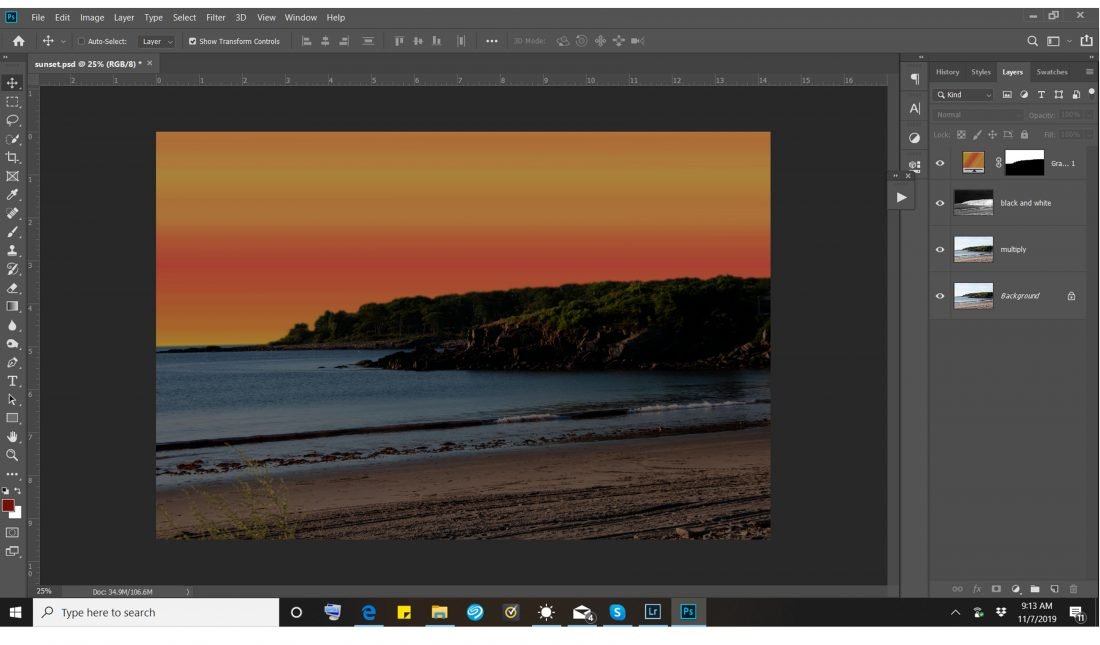
Repeat the same steps, with a few modifications.
- Darken your photo using a Multiply Blending Mode and duplicate layers.
- Double-click on the Gradient Fill Layer icon, and then select the Gradient option.
- Set the Roughness to 14%.
- Select the HSB Color Mode.
- Adjust the three Color Sliders to yield desired Hues for your sunset sky.
Note/Tip. Move the Color Sliders also to make the most of the yellows and oranges. You may also experiment with the opacity of either or BOTH the Gradient and Black and White layers as preferred.
Summary
You can use this 3 step process to modify the sky of any photo to reflect the mood in your layout design.
- Darken your photo using a Multiply Blending Mode and duplicate layers.
- Create and modify a Gradient ‘color’ layer.
- Apply this layer to the sky area of your photo.
TRY THIS:
- Experiment with different Blending Modes.
- Play with Color Sliders to discover NEWcolor combinations.
- Adjust the Roughness of the Gradient and , and the sliders. .
Nicely done. Will need to give this a try.
This is very helpful to know, and I look forward to using your process, Joan. Thank you!
Fascinating tutorial, Joan! I would never have thought of changing the sky…will have to experiment with some landscape photos! Thanks!