
Creative Team Member, Ulla-May, shares her Psychedelic Filter Effect Tutorial in Adobe Photoshop.
Psychedelic Filter Effect
Story Behind The Art
I first used the effect described in this tutorial more than 10 years ago.
I loved the outcome so much that I had the page printed and hung it on one of my walls, but I didn’t use the technique for a while, and forgot how to do it.
I’ve been trying to recreate the effect for a long time.
Justa few weeks ago, I was searching through filters for a different page and rediscovered the filter I used on the original page.
I hope you enjoy this effect and have a lot of fun with it.
Supplies: ArtPlay Palette City Limits, FotoBlendz Clipping Mask ValuePack No. 1,
1. The Foundation
Create a background for your artistry.
- Create a new 12 x 12 layout at 300 dpi in Adobe Photoshop or Elements.
- Open and move an artsy or a solid paper of your choice onto the new layout using the Move Tool from the Tools Panel to create your layout foundation.
- I used an artsy paper from ArtPlay Palette City Limits.
2. Photo Selection
Choose a photo for your layout.
- Open your photo in a separate window and edit as preferred.
- When you are done with the photo work, as described below, you will move the photo to your foundation to complete your page.
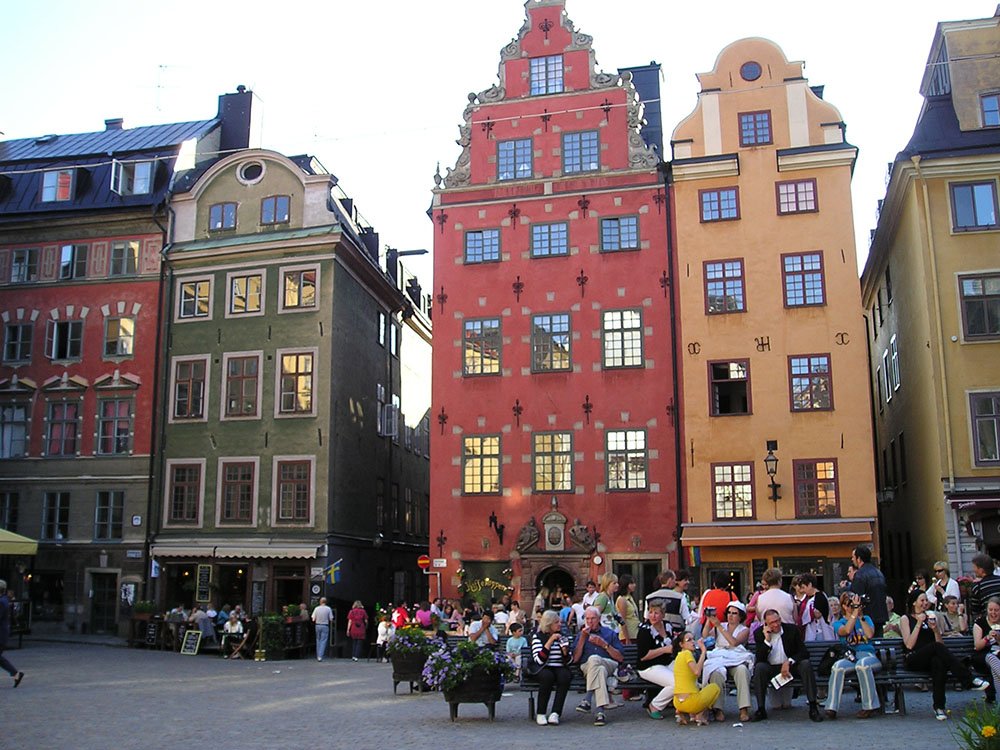
- The best photos for this technique are street photos and buildings.
- Duplicate your photo, Image> Duplicate> OK.
Note. You do not want to work on your original image.
3. Filters
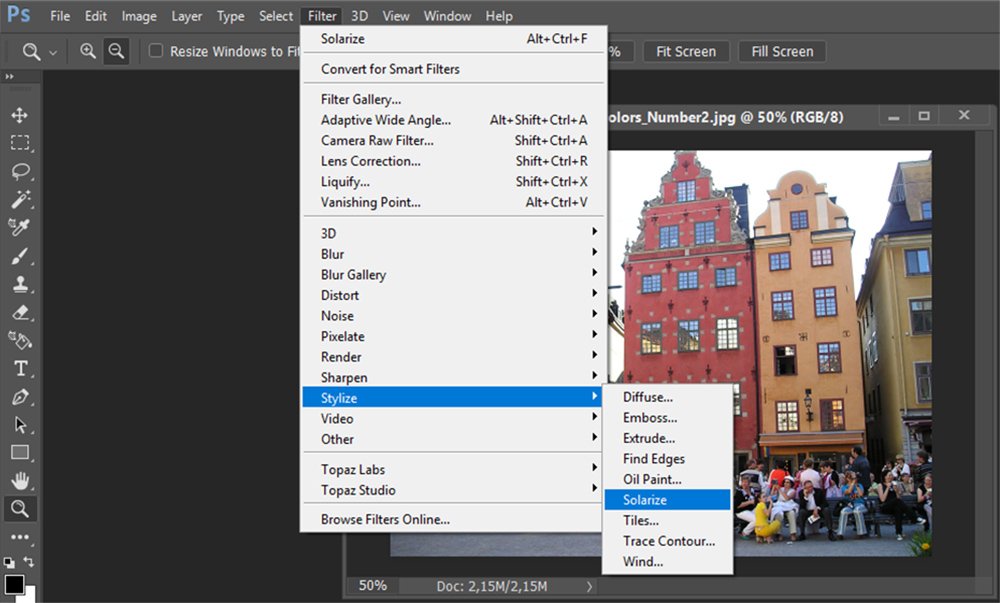
Apply the Solarize Filter.
- Go to Filter> Stylize> Solarize and apply to the copy layer.
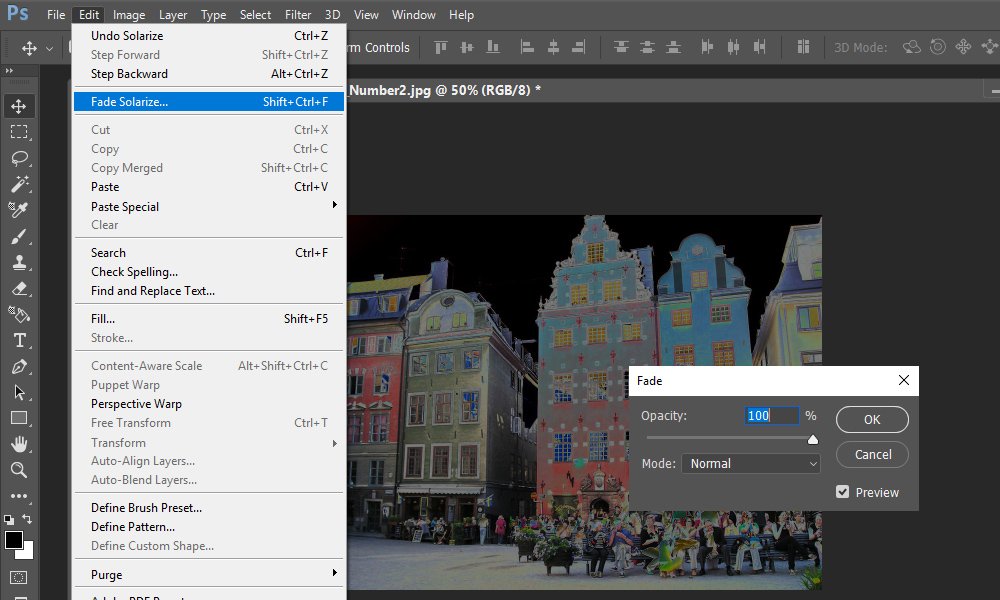
- Go to Edit> Fade to modify the results.
- This will allow you to change the Opacity and Blending Mode of the effetc.
Note. You can only use the Fade option immediately after applying the Solarize Filter.
- This option will ghost (be grayed out and become unavilable) in the Edit fly-out menu if you make additional edits after applying this filter.
- If you use the Fade option, you will not be able to go back and adjust it later.
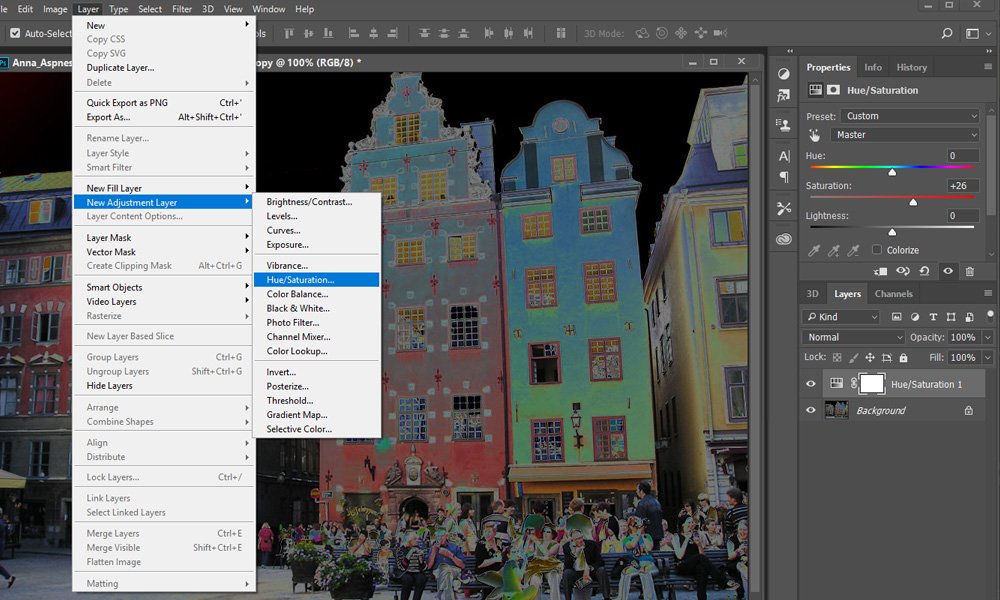
- I used Hue/Saturation Adjustment layers instead of using the Fade option.
- These Adjustments Layers tend to be more practical because you can go back and adjust them as your page progresses.
4. Adjustment Layers
Add an Hue/Saturation Adjustment Layer.
- Go to Layer> New Adjustments Layer> Hue/Saturation and click OK.
- Play with the individual sliders until you get a look that you like.
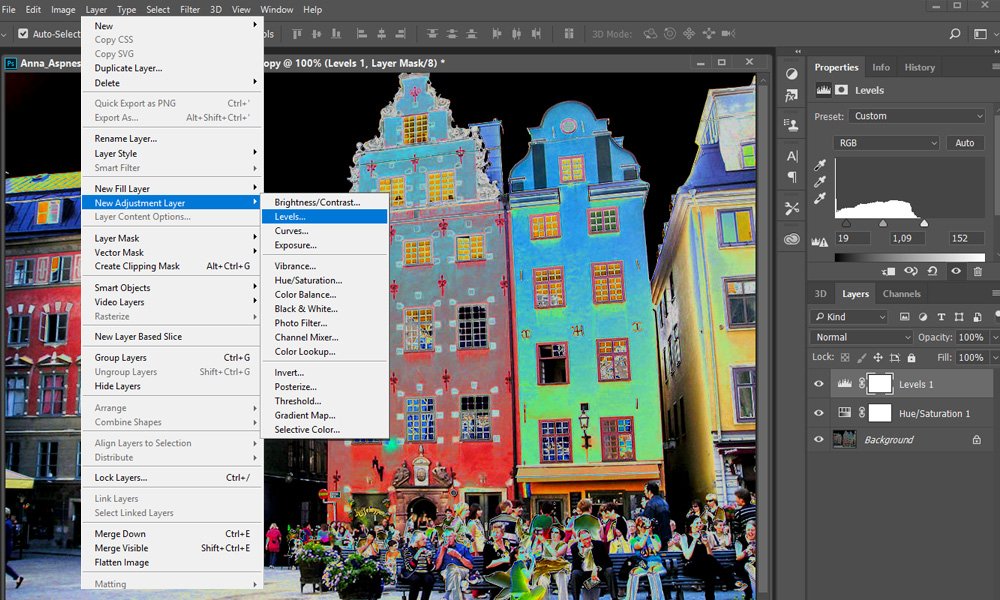
Add a Levels Adjustment Layer.
- Go to Layer> New Adjustments Layer> Levels and click OK.
- This Adjustment Layer will allow you to increase the contrast in your image.
- Play with the individual sliders until you get a look that you like.
5. Masking
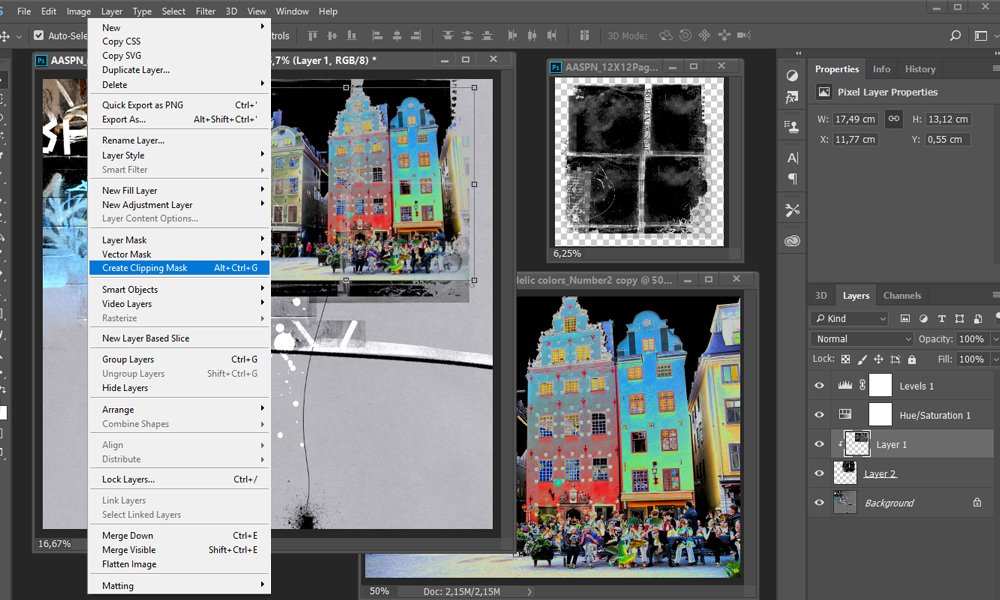
Choose a Fotoblendz Clipping Mask to blend your photo.
- Clip your photo to a mask to give it additional interest. I chose a mask from FotoBlendz Clipping Mask ValuePack No. 1.
6. Placement
Move your masked photo and adjustment layers to your foundation layer.
- Highlight the photo layer, and the clipped Adjustment Layers, and move them together to your foundation.
- Taking this extra step will allow you to continue to make changes to your image while you complete your page.
7. Embellish
Complete your page with elements of your choice.
- Consider using a variety of brushes, textures, text, or other elements.
- I used ArchiTextures No 4 and ArchiTextures No 5, in addition to the ArtPlay Palette Elements.
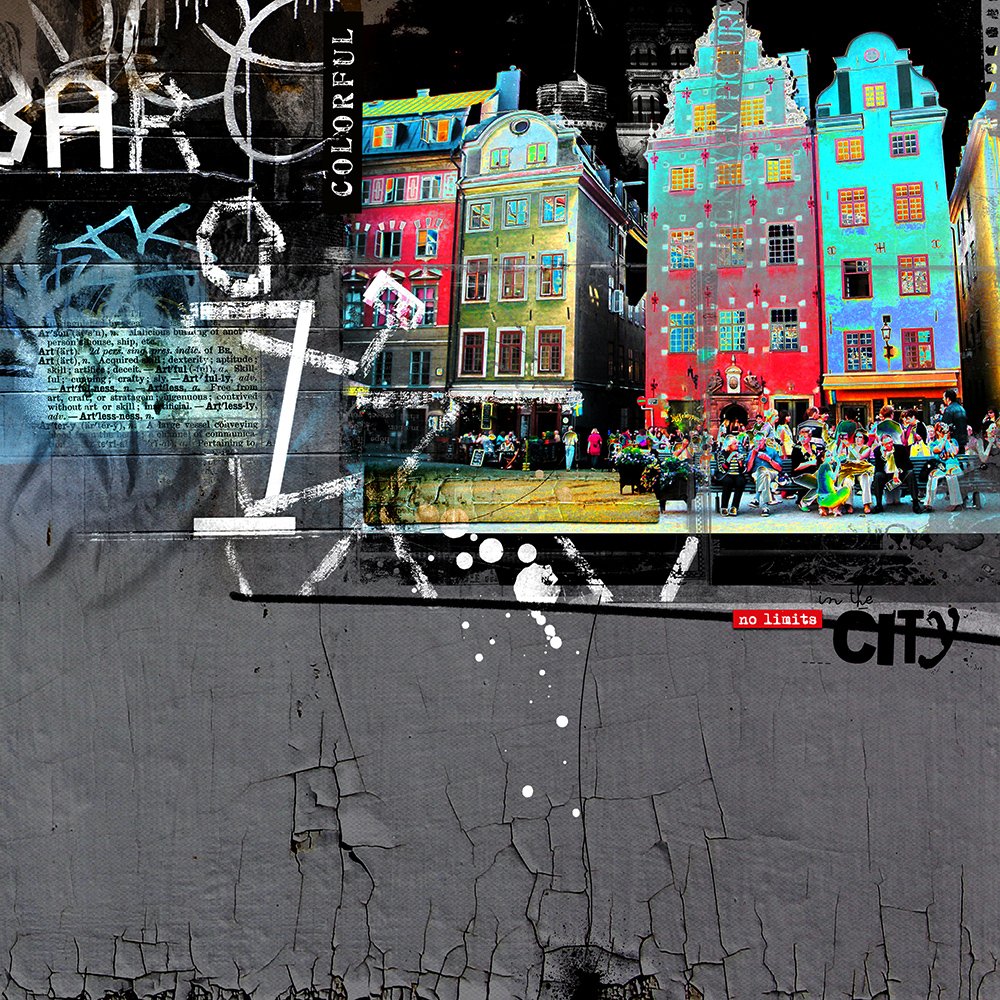
Post your layouts using this Psychedelic Filter Effect tutorial and Artsy Digital Scrapbooking Design ideas in the Gallery.
And if you like this post, please help us help you by sharing it using the social media buttons below.
This is so cool! I will definitely be trying this. Thanks so much for the tutorial!