
Today, Creative Team Member Barbara Houston, is sharing her Gradient Tool Photo Composites technique.
Gradient Tool Photo Composites
What is photo compositing photos?
The action of taking 2 images and seamlessly blending them together in Photoshop or Elements.
It the perfect accompaniment to your artsy digital scrapbooking or photo artistry.
Not to mention a whole lot of fun!
Guidance for photo compositing
- Use photos that were taken in the same lighting to ensure natural results.
- You could also manipulate the lighting on images in Photoshop/Elements.
Many people have mistaken this page as comprising of only one photo – Let me show you how…
1. Create Foundation
Establish a new layout and arrange photos.
- Go to File> New (Photoshop) or File> New> Blank File (Elements) to to create a New Layout at 12 x 12 inches and 300 DPI file.
- Go to File> Open, navigate to your photos, select 2 images and open into your work space.
- Select the Move Tool from the Tools Panel, then CLICK-DRAG-RELEASE each photo onto the New Layout.
- Arrange the 2 photos as preferred, again using the Move Tool and the CLICK-DRAG-RELEASE method.
- RESIZE the images as preferred by using the Transform Controls as outlined in this video.
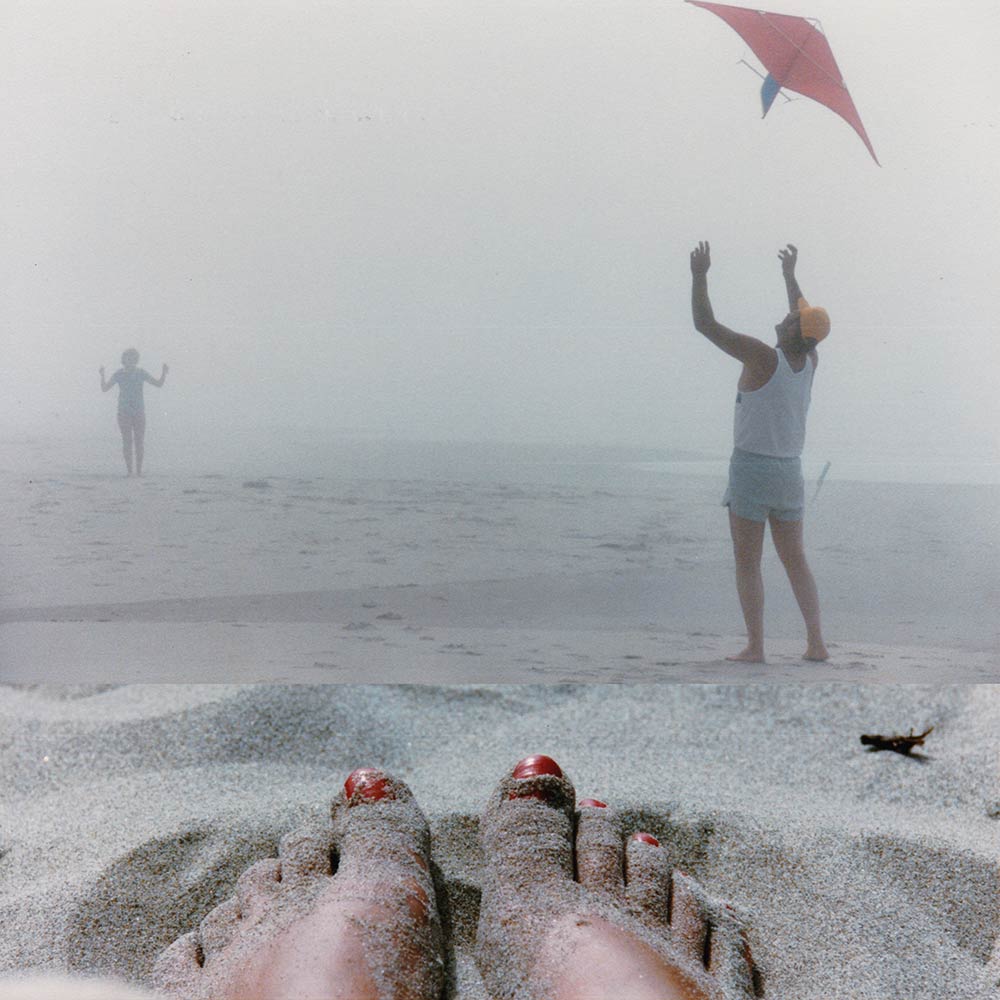
2. Blend Photos
Use the Gradient Tool to remove the sharp edge of the photo and create a seamless blend.
- Apply a Layer Mask to the overlapping photo by clicking on the ‘Layer Mask’ icon (square with circle in the middle) at the bottom (Photoshop) or top (Elements) of the Layers Panel.
- Select the Gradient Tool from the Tools Panel.
- Change the Foreground Color to BLACK and the Background Color to WHITE from the Tools Panel using the Color Picker.
- CLICK-DRAG-RELEASE close to the edge of the sharp edge to remove.
- The more you drag, the greater the gradient will be,
TIP. Hold down the SHIFT button on your keyboard to create a straight gradient.
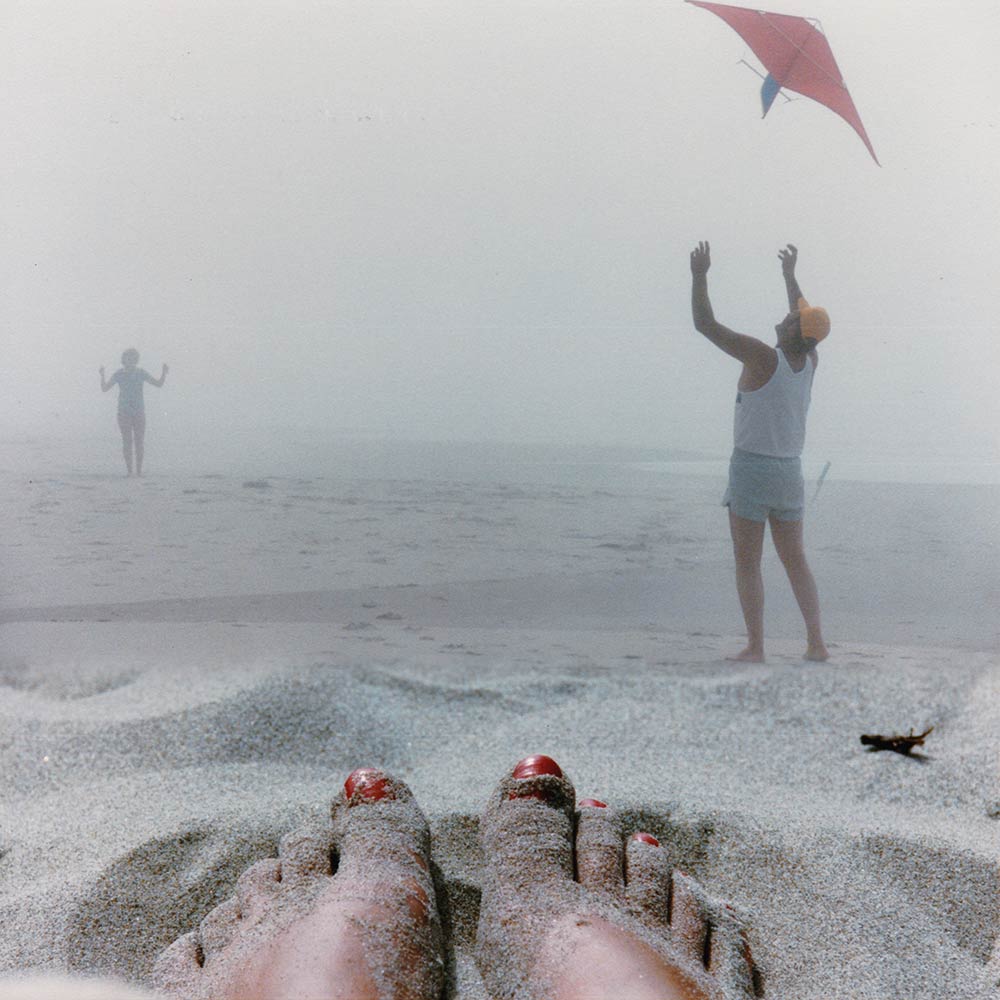
Notice how this action removes the sharp edge where the top photo overlaps the bottom photo and blends the 2 photos together.
3. Hide Imperfections
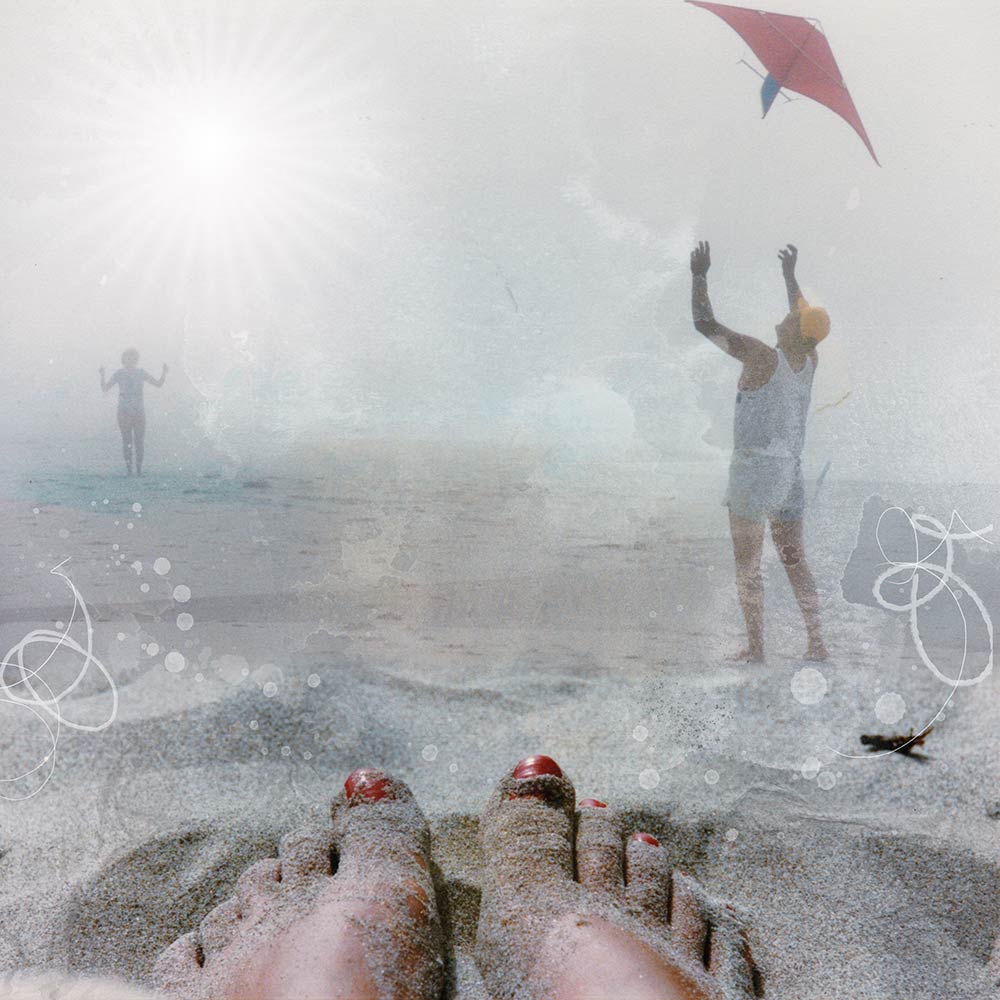
The addition of Transfers and ArtStrokes from ArtPlay Palette aid in moving the eye away from any imperfections.
- Support the theme and mood of the photo using digital designs
- Transfers3.png and 8.png from ArtPlay Palette Evenfall enhance the thick morning fog on the beach.
- ArtStrokes with Screen Blending Mode applied from the Layers Panel add ‘creative license’ to the design.
- FotoGlows from MutiMedia element sets add LIGHT.
4. New Focal Point
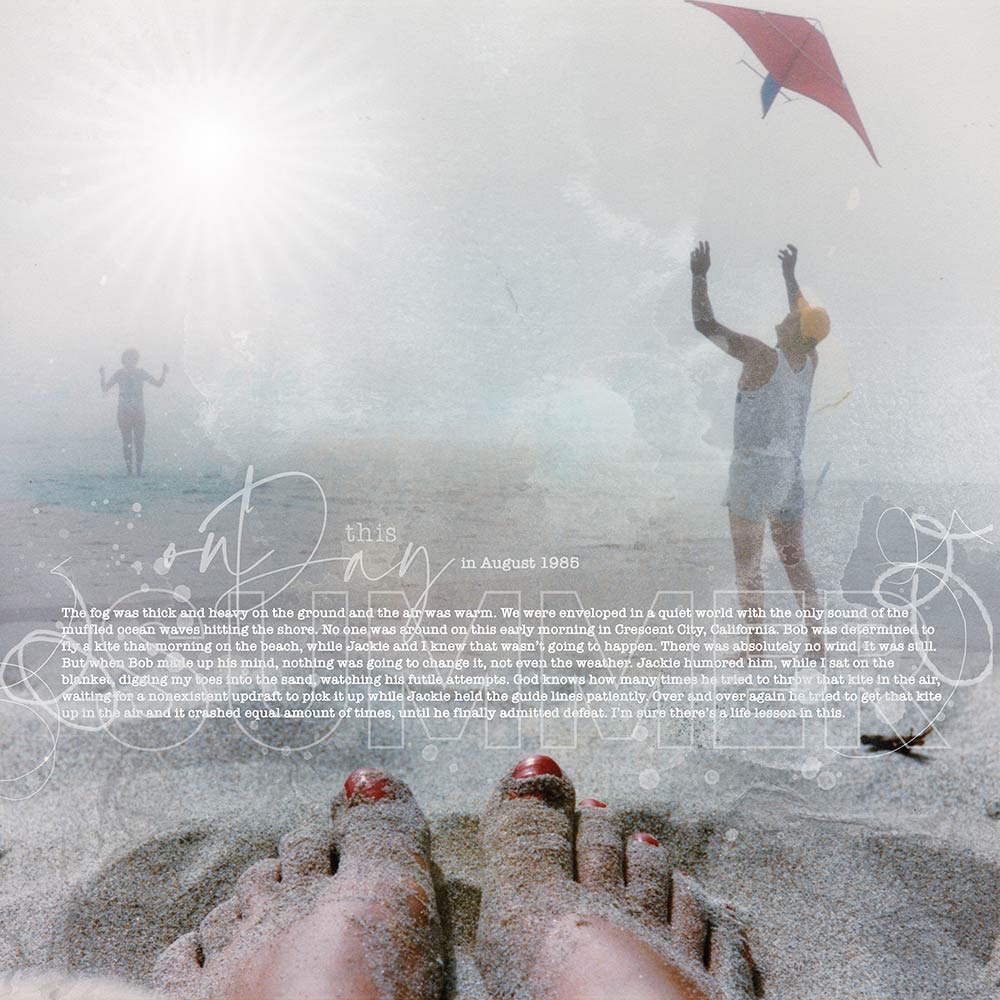
Words placed over the area where the 2 photos meet provides the eye with a new focal point.
- ‘Mask’ the area with WordART and your journaling.
POST YOUR Layouts USING THESE Gradient Tool Photo Composites TECHNIQUES IN THE ANNAGALLERY.
And if you liked this post, I would be so grateful if you would share it with your friends using the social media buttons below.
Fabulous tutorial and page! Love the blending of these 2 images. Thanks so much for another fantastic tutorial
Happy you enjoyed. Barbara is a treasure trove of ideas.
What a fun technique to use for blending! I love how the added transfers and word art hide the transition of the two photos, and also transform it. Thanks Barbara for sharing these techniques.
YES to this Beverly!
Great tutorial, Barbara! I can’t wait to try it. The whole scene makes me wish for a trip to the beach. It was awesome seeing your name on this tutorial also!
Barbara has some beautiful creative ideas.