
Creative Team Member, Ulla-May, shares her process to create a cartoon effect in Adobe Photoshop.
Cartoon effect is a fun way to give a photo a more funky style.
Create a Cartoon Effect
Step 1. Open and duplicate your photo.
- Close the original photo and work on the copy.
- Right-click on the photo layer in the Layers Panel,choose Layer from background and then click OK.
- Go to Image> Image size and set the Height to 1000 px and the Resolution to 150 px/inch.
- This is important as the final photo is depending on these settings.
Step 2. Make 2 copies of your photo.
- Press Ctrl+J twice.
- Name the top layer Color Halftone and the layer below Poster Edges.
- Hide (turn off the visibility of) the top layer temporarily.
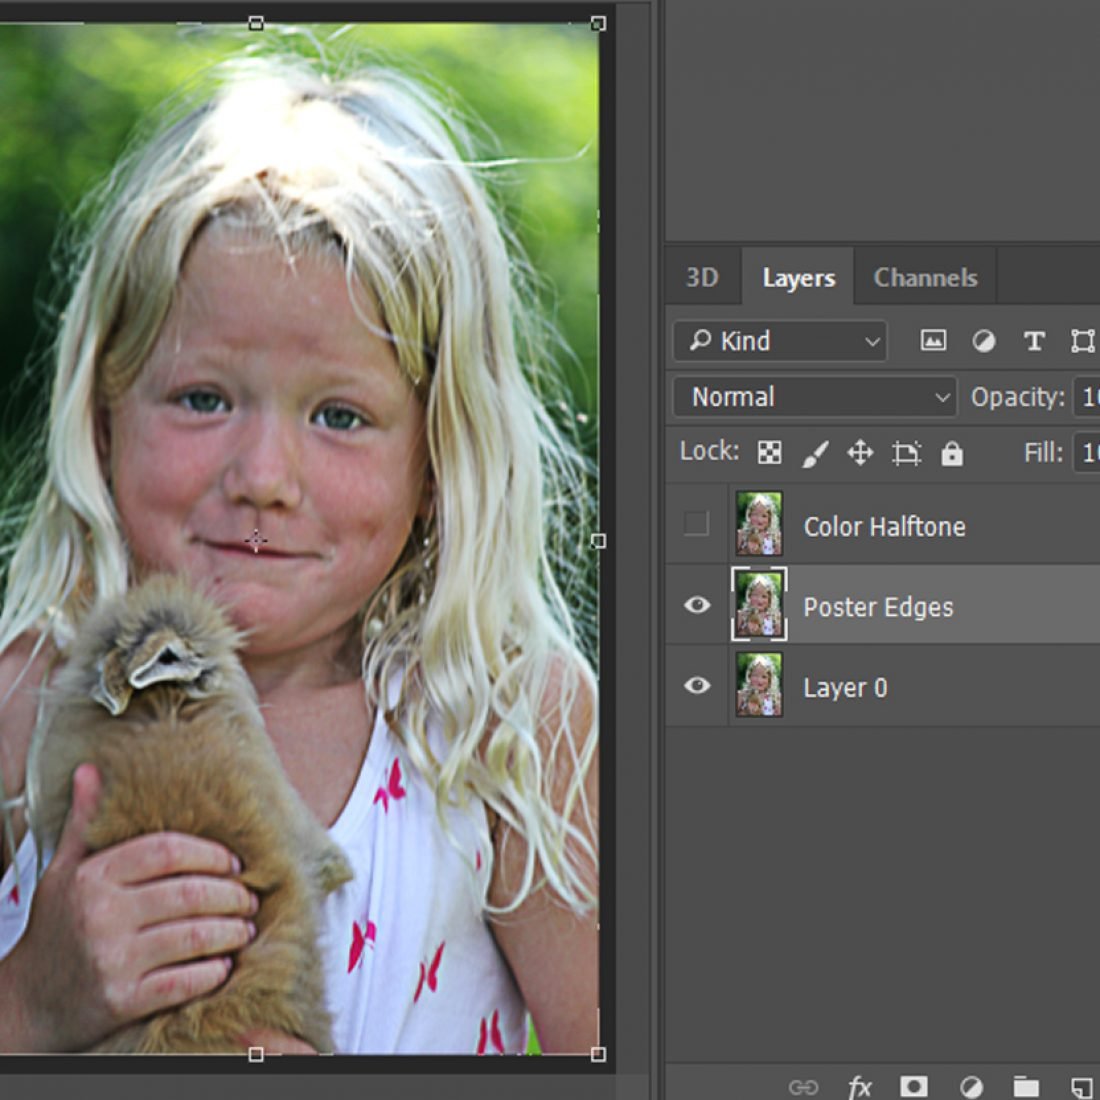
Step 3. Add Poster Edges Filter to the Poster Edges layer.
- Go to Filter> Filter Gallery> Artistic> Poster Edges.
- Set the Edge Thickness to 2, Edge Intensity to 1 and Posterization to 2.
- Click OK.
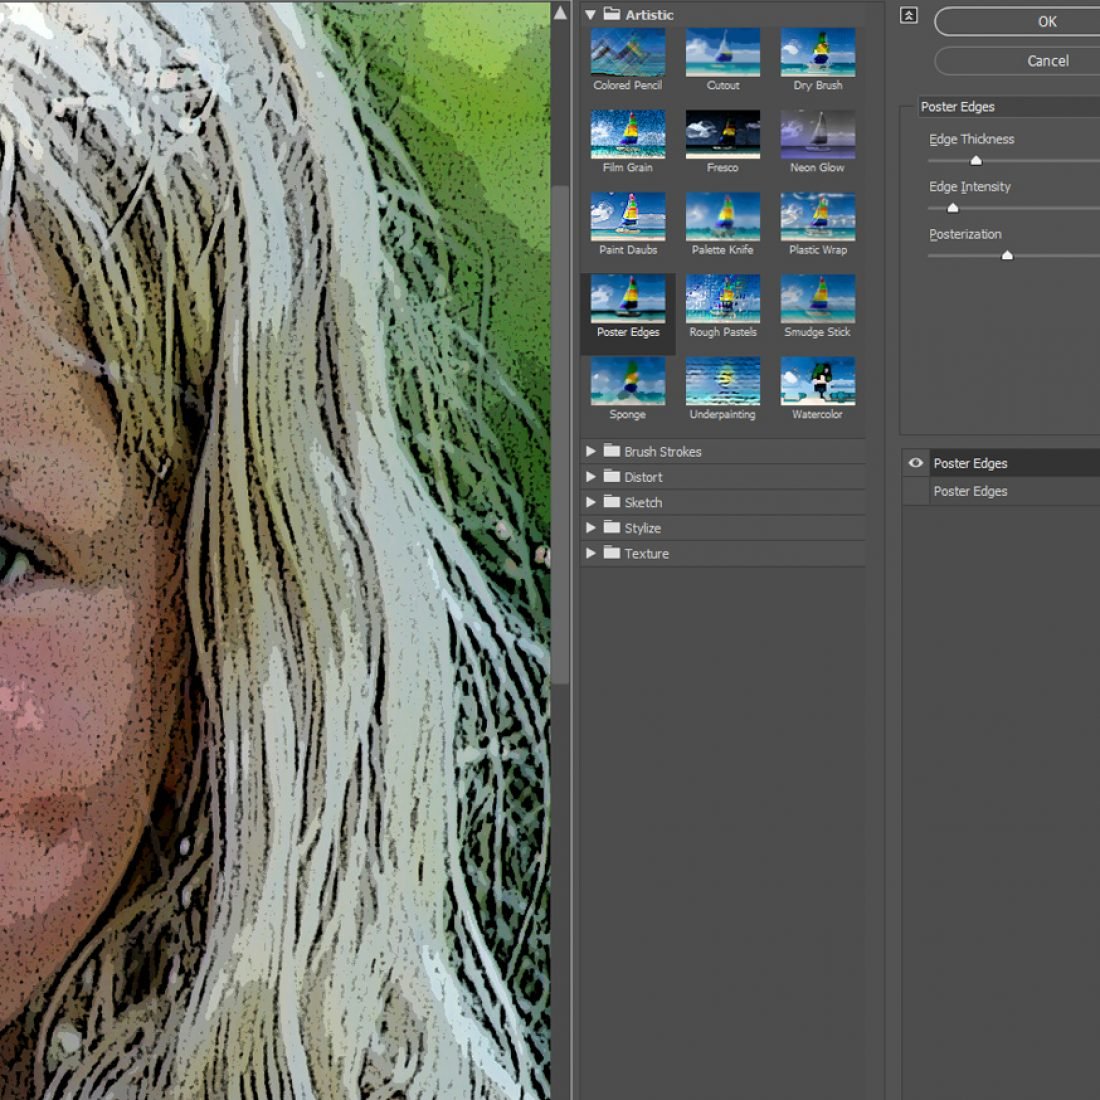
Step 4. Add a Cartoon border
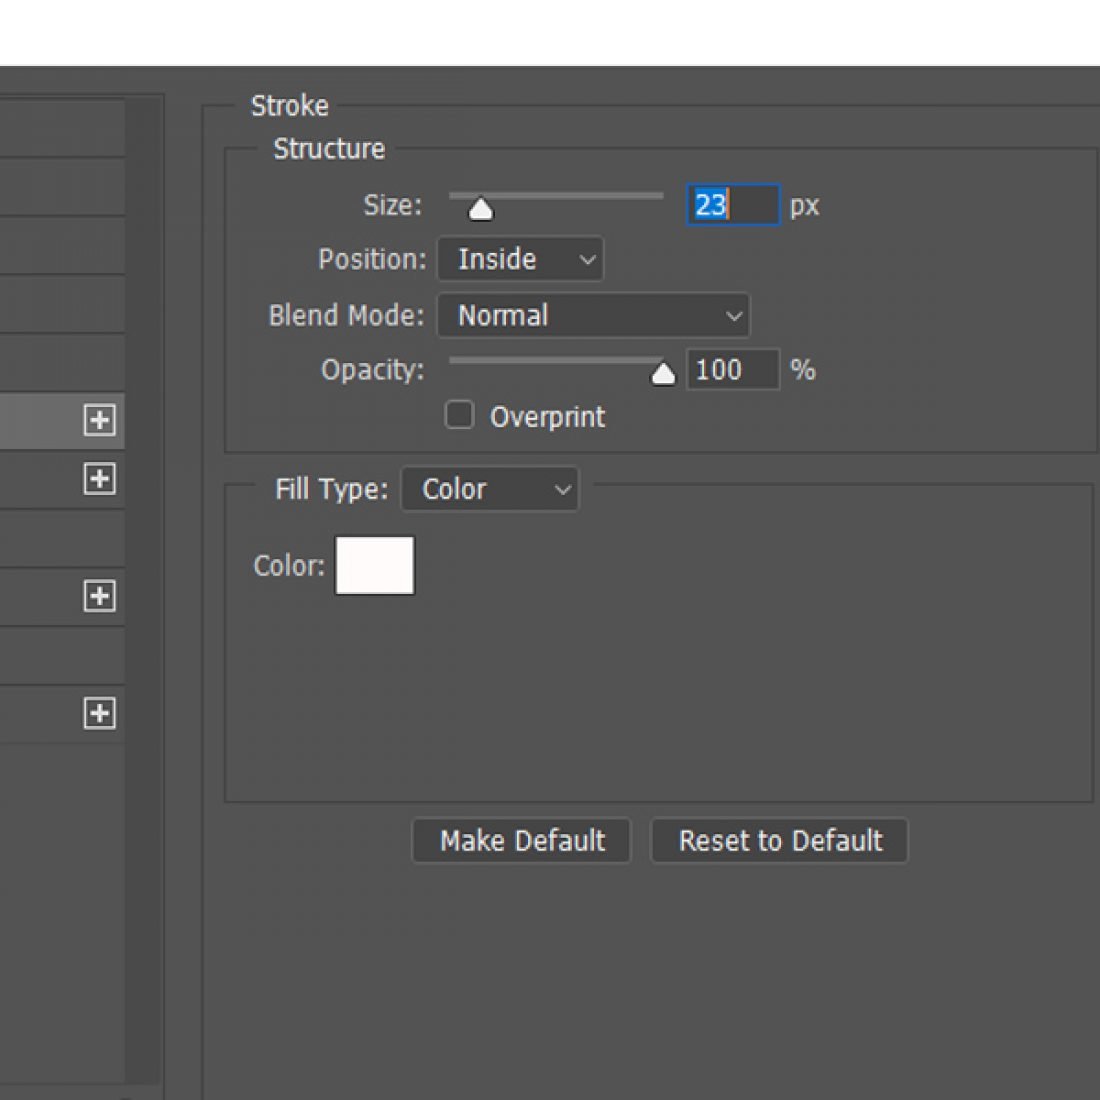
- Go to Layer> Layer Style> Stroke.
- In the Layer Style dialogue box, click on the color box and choose white.
- Set the Size to 23 px and the Position to Inside.
- Click OK.
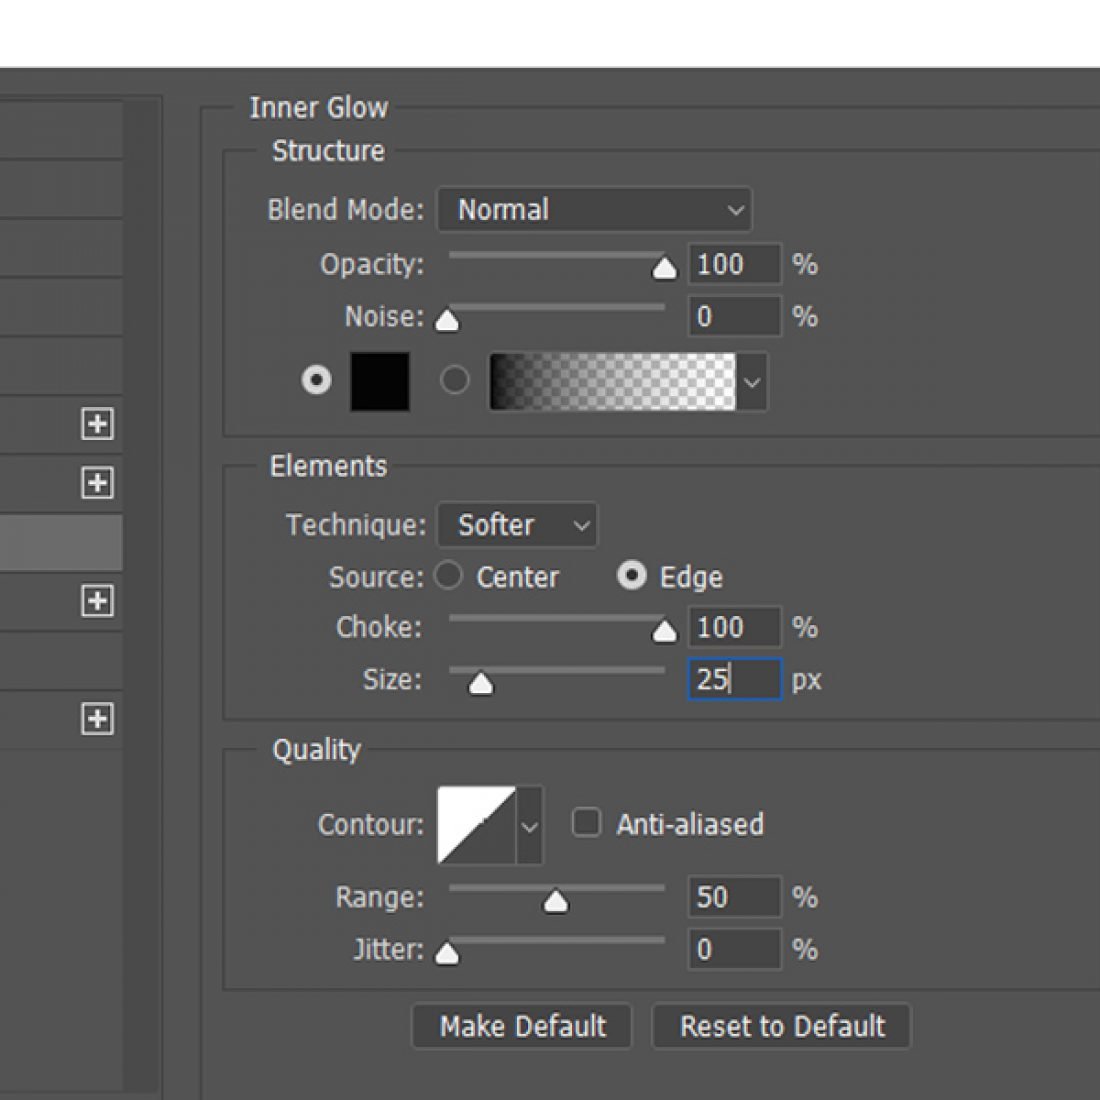
- Then go to Layer> Layer Style> Inner Glow.
- Click on the color box in the Layer Style window and choose black.
- Click OK.
- Set the Blend Mode to Normal, Opacity to 100%, Choke to 100% and the Size 25 px.
- Then click OK.
Step 5. Add Adjustment Layers for Vibrance, Levels and Brightness/Contrast.
- With the Poster Edges layer highlighted, go to Layer> New Adjustment Layer> Vibrance.
- Click OK.
- Increase the amount of Vibrance as you prefer.
- Repeat for Levels and Brightness/Contrast.
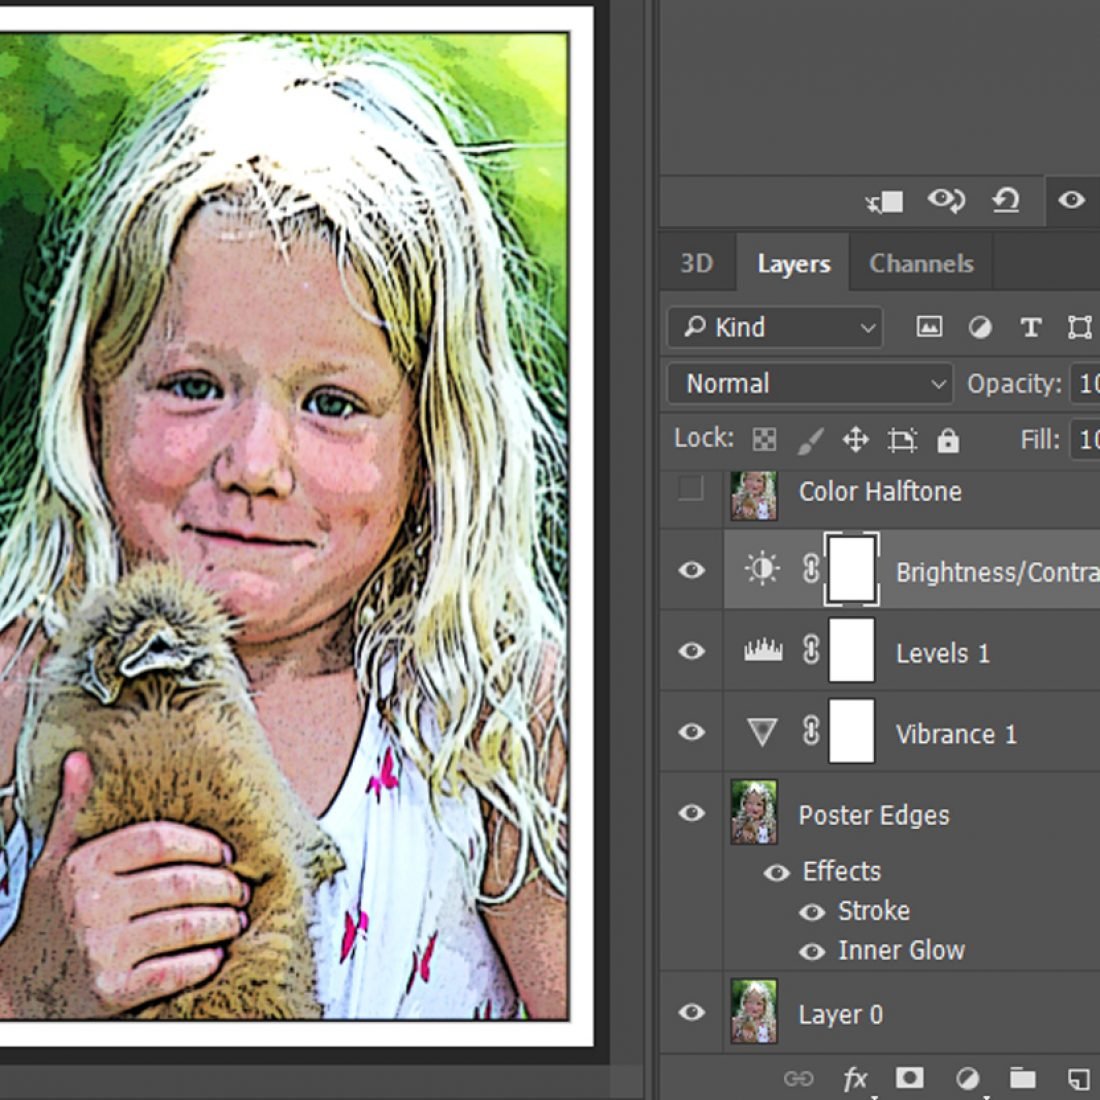
Step 6. Make the Color Halftone layer visible and add the Color Halftone filter.
- Turn on the visibility of the Color Halftone layer.
- Then go to Filter> Pixelate> Color Halftone.
- Choose a Radius 6 and leave the other amounts as they are.
- Click OK.
- Change the Blend Mode to Soft Light for this layer.
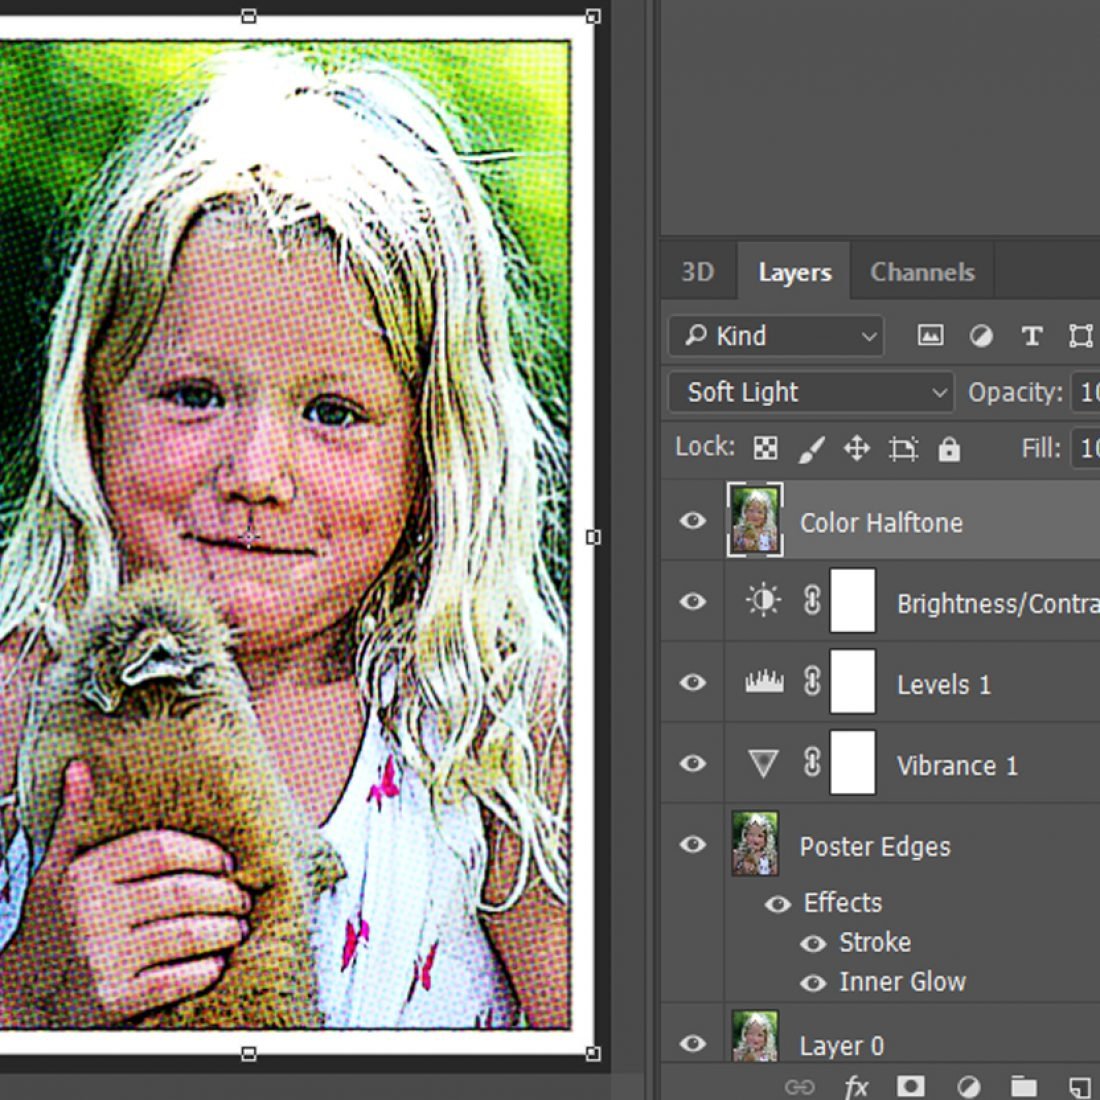
Credits: ArtPlay Palette Special One and ArtPlay Palette Lush.
Post your digital artistry and artsy digital scrapbooking pages in The Gallery.
If you liked this Create a Cartoon Effect Tutorial, please consider sharing it using the social media buttons below.
Set the Blend Mode to Normal, Opacity to 100%, Choke to 100% and the Size 25 px.
I was following along the directions and was puzzled by the direction “Choke” in the above phrase where is it?
Ulla-May says, “Step 4 is both for add a Stroke and Inner Glow (one photo for each of these two). I began to add a stroke, Layer> Layer Style> Stroke and the window for Layer Style is open up with the Stroke highlighted on the left side (first photo). I used the settings on the first photo and clicked OK. Then I chose Layer> Layer Style> Inner Glow and the Layer Style opened up again with the Inner Glow highlighted on the left side (second photo). In the middle of the window where the settings for Inner Glow can be changed, there is three parts: Structure, Elements and Quality. Under Elements you´ll find Technique, Source, Choke and Size. I used the settings shown in the second photo and then clicked OK.” Please let us know if you have further questions.