
Today, Creative Team Member, Nancy Adams, is sharing how to create Custom Inset Dimensional Frames.
This tutorial is created in Adobe Photoshop Elements but can be easily adapted in Adobe Photoshop
Custom Inset Dimensional Frames
Introduction
Create your own Custom Inset Dimensional Frames in Adobe Photoshop Elements.
Learn how to:
- Use Dimension to strengthen a Focal Point in your digital scrapbooking and photo artistry layout designs.
- Apply Guides and Shapes to create a foundation to your inset dimensional frame.
- Create the cut-put effect using a Color Fill Layer and the Magic Wand Tool.
- Add Layer Style effects to yield Texture and Emphasis Design Principles.
1. Establish Layout Foundation
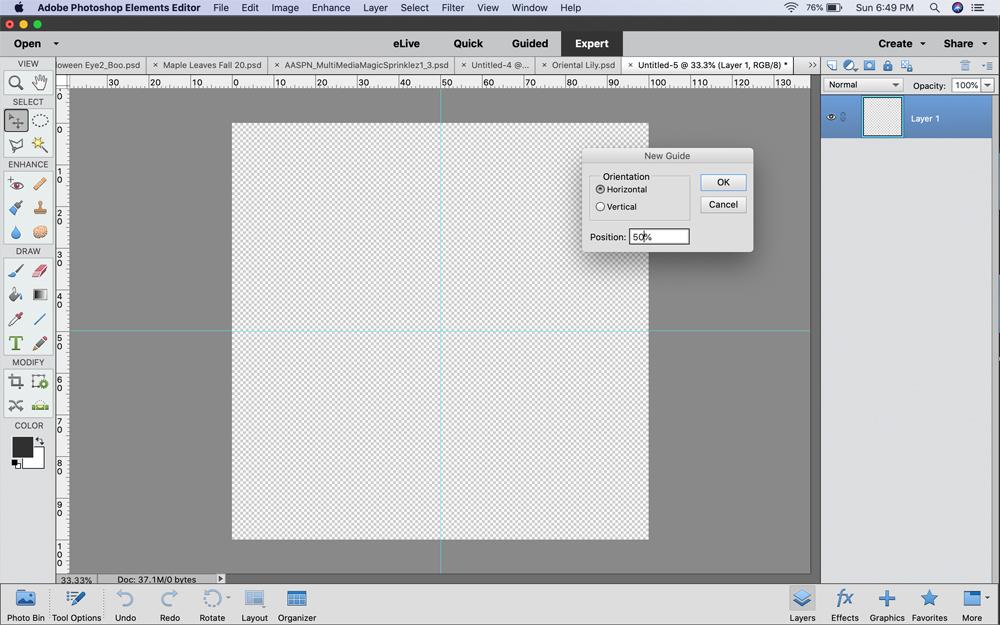
Use the ‘Lock ‘ Guides to center the shape in your layout design.
- Create a New Layout via File> New> Blank File
- Set the Dimensions to 12 X 12 inches with a Resolution of 300 DPI/PPI.
- Go to View> New Guide> Vertical and enter a Position value at the inch mark here you want to vertical guide to reside.
- Repeat with View> New Guide> Horizontal and enter a value for the Position of the horizontal guide.
Note. You can also enable the Rulers by checking that option from the View menu, then click in the margins and drag-release to create the Guide manually.
2. Draw a Shape
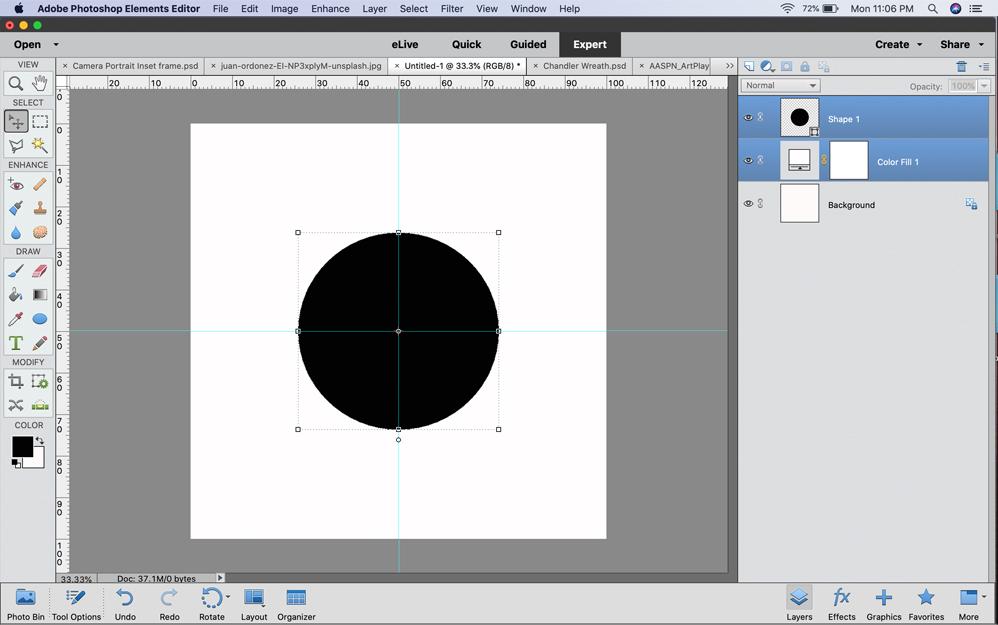
Use the Shape Tool to create a foundation for the inset frame or ‘window’ effect.
- Add a New Layer via Layer> New Layer.
- Select the Shape Tool from the Tools Panel and choose a shape of choice.
- Select the Ellipse Tool for a circle shape.
- Click and drag on the layout design to form the circle, holding down the SHIFT key to maintain proportions.
- You can also go to Image> Transform> Free Transform to modify or reposition the circle.
- Position so the center of the circle aligns where the Horizontal and Vertical Guides intersect.
Notes.
- You can also hold down the Spacebar to move the circle while your are creating the shape.
- Also consider using Fonts or Dingbats with the Text Tool.
3. Create Dimensional Effect
Yield a cut-out window effect by deleting a selection and adding a Drop Shadow Layer Style.
- Go to Layer> New Fill Layer> Solid Color and position below the shape layer in the Layers Panel.
- Rasterize the Adjustment Layer by going to Layer> Simplify Layer ( or Layer> Rasterize in Photoshop) to making it editable.
- You can also create a New Layer and go to Edit> Fill (Layer).
- Ensure the Shape Layer is selected in the Layers Panel.
- Click on the Magic Wand Tool in the Tools Panel and click within the area of the circle shape.
- Notice the Marching Ants appear around the shape to denote a Selection.
- Now select the Color Fill Layer in the Layers Panel and press the Delete button on your keyboard.
- Notice how this cuts a circle out of the Color Fill Layer
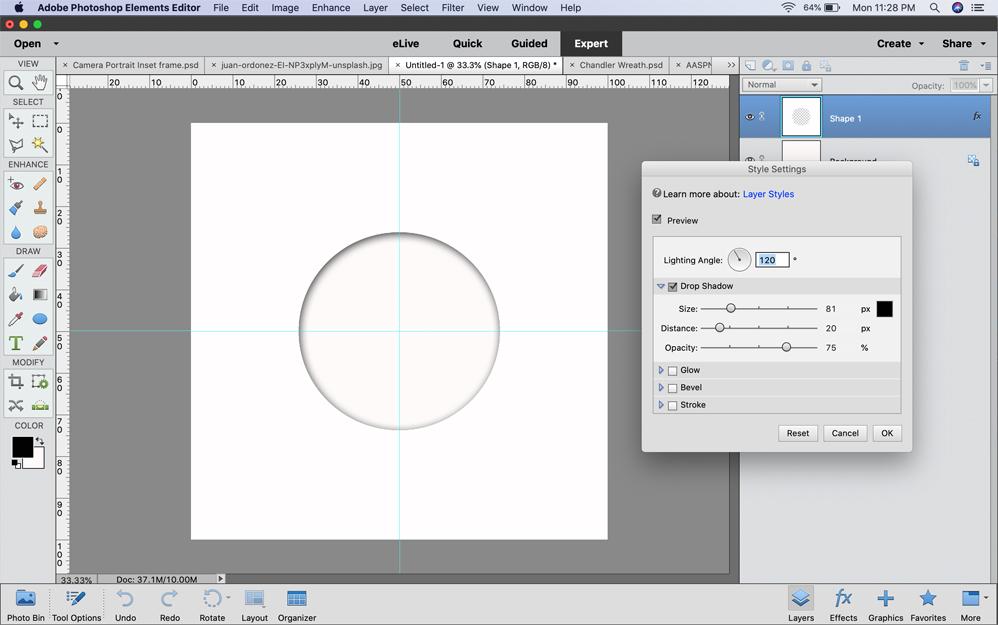
- Go to Layer> Layer Style> Style Settings Drop Shadow to apply a Drop Shadow Layer Style.
Notes. Drop Shadow Layer Style settings: Lighting Angle of 120 degrees, Size of 81, Distance 20, Opacity of 75%.
4. Stroke to Emphasize
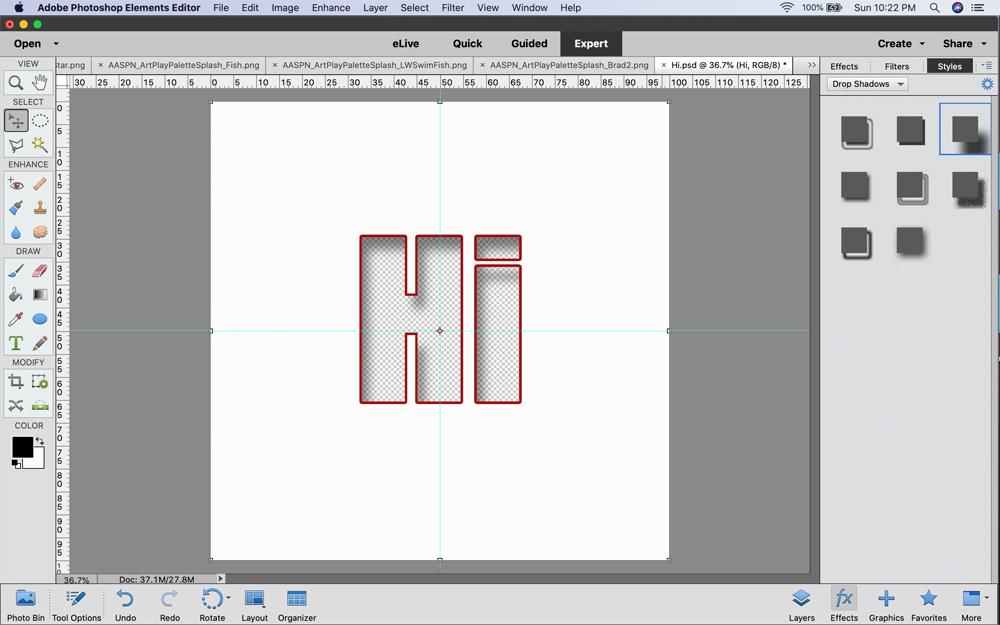
Apply a Stroke Layer to the inset window frame to create more definition.
- Go to Select> Reselect or use the Magic Wand Tool to recreate the Selection.
- Click on the ‘fx’ symbol next to the Color Fill Layer in the Layers Panel.
- Click on the Stroke option to apply a solid colored line to the edge of the inset window frame.
Note. Adjust the Size as preferred, set the Position to Outside and clock on the small colored square thumbnail to active the Color Picker and make a different color selection.
4. Embellish with DigitalART
Add your photos and DigitalART supplies.
- Position the photo layer beneath the inset frame cut-out in the Layers Panel.
- Clip a digital paper to the Color Fill Layer using the Clipping Mask function to embellish.
- Add elements and title to enhance the dimensional effect and add context to your story.

DigitalART Supplies
Please see the following links below for complete asset list plus additional process notes:
Summary
Use this technique with a variety of shapes to add dimension to your digital scrapbooking and photo artistry layout designs.
- Choose a Shape.
- Create a cut-out effect from the Selection.
- Add special effects using Layer Styles.
Try This:
- Use different Shapes, Brushes and Text to create different Selections.
- Experiment with varying Layer Styles to yield variations in the dimensional effect.