
Today, Creative Team Member, Margó Juhász is sharing a Embossed Cut-Out Title Effect.
Embossed Cut-Out Title Effect
Introduction
Create a cut-out text effect in Photoshop or Elements.
- Create a Text Selection using keyboard shortcuts
- Apply a Inverted Layer Mask.
- Add a Bevel and Emboss Layer Style to enhance the effect.
1. Establish Layout Foundation
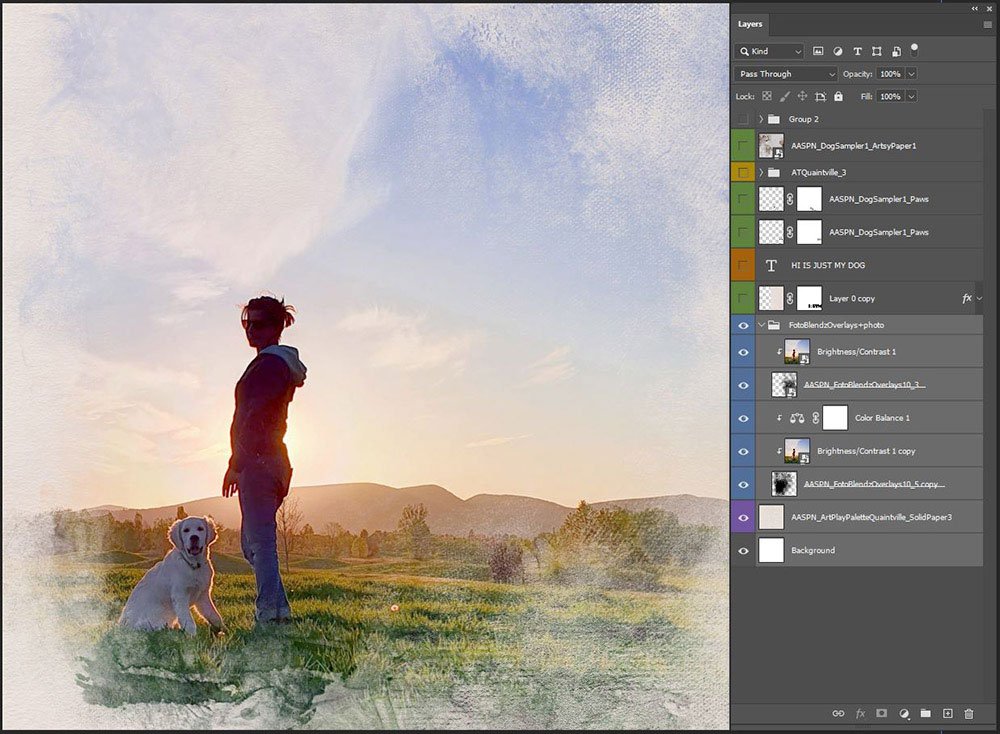
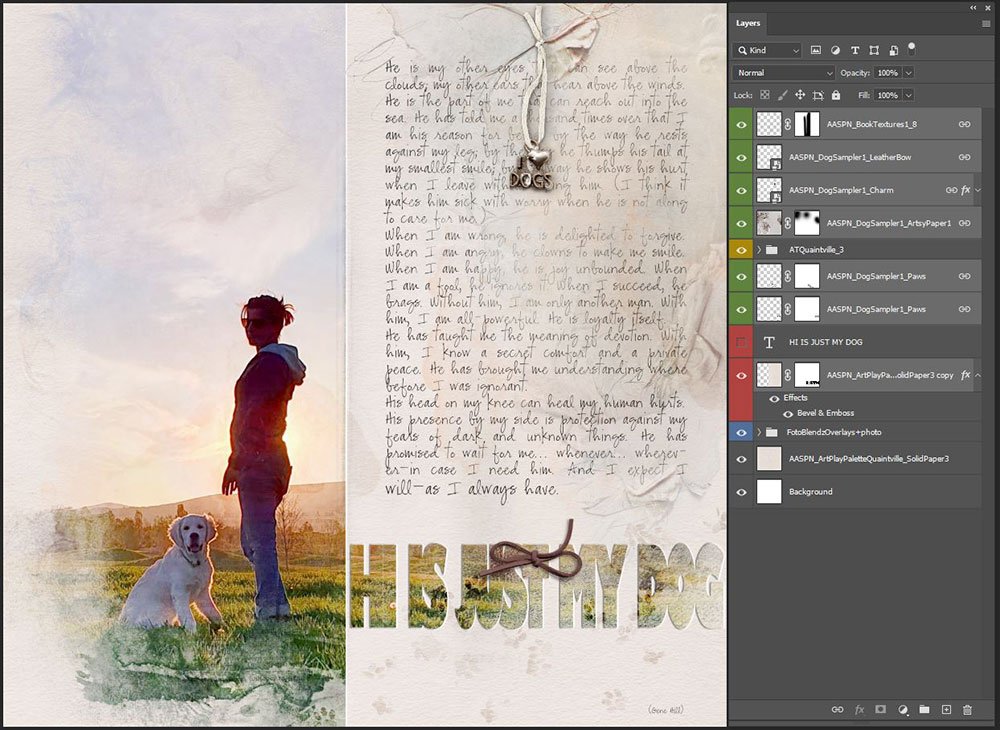
Create the foundation for your layout design using a Solid Paper and a photo clipped to a FotoBlendz mask.
- Go to File> New (Layout) and create a new 12 X 12 300 DPI file.
- Open the SolidPaper3.jpg file from ArtPlay Palette Quaintville.
- Open and move the 1.png file from FotoBlendz Overlays No. 10 using the Move Tool from the Tools Panel.
- Duplicate the FotoBlendz layer by dragging the layer to the ‘New Layer’ icon in the Layers Panel.
- Select the FotoBlendz layers in the Layers Panel and go to Layer> Merge Layers to increase the density of the mask.
- Open a photo and move the photo onto the layout so it is positioned directly over the clipping mask layer.
Note. You can clip the same photo to multiple clipping mask layers to extend photo coverage – See Modify Clipping Masks for further guidance.
Tip. It’s can be a GOOD idea to link the layers.
2. Create Text Layer
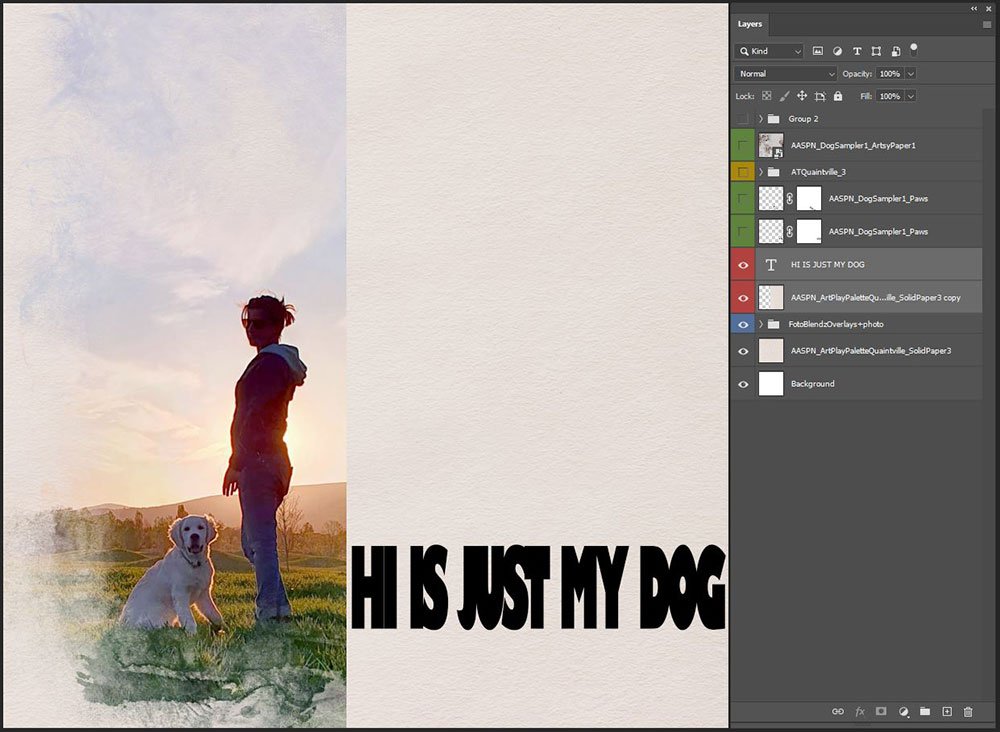
Use the text options in Photoshop to add text to your layout foundation.
- Open the SolidPaper3.jpg file from the ArtPlay Palette Quaintville.
- Move the Solid Paper on top of the FotoBlendz Clipping Set and position it so that it covers only half of the photo.
- Select the Type Tool from the Tools Panel and choose the Horizontal Type Tool option.
- Copy or type the text and reposition as preferred.
Note. You can also make a selection and use an Edit> Fill (Color) layer instead of the Solid Paper if you would like to color-match with your photo.
Tip. Adjust the SIZE of the characters or the SPACING of the text as preferred to best accommodate your design.
3. Achieve Cut-Out Text Effect
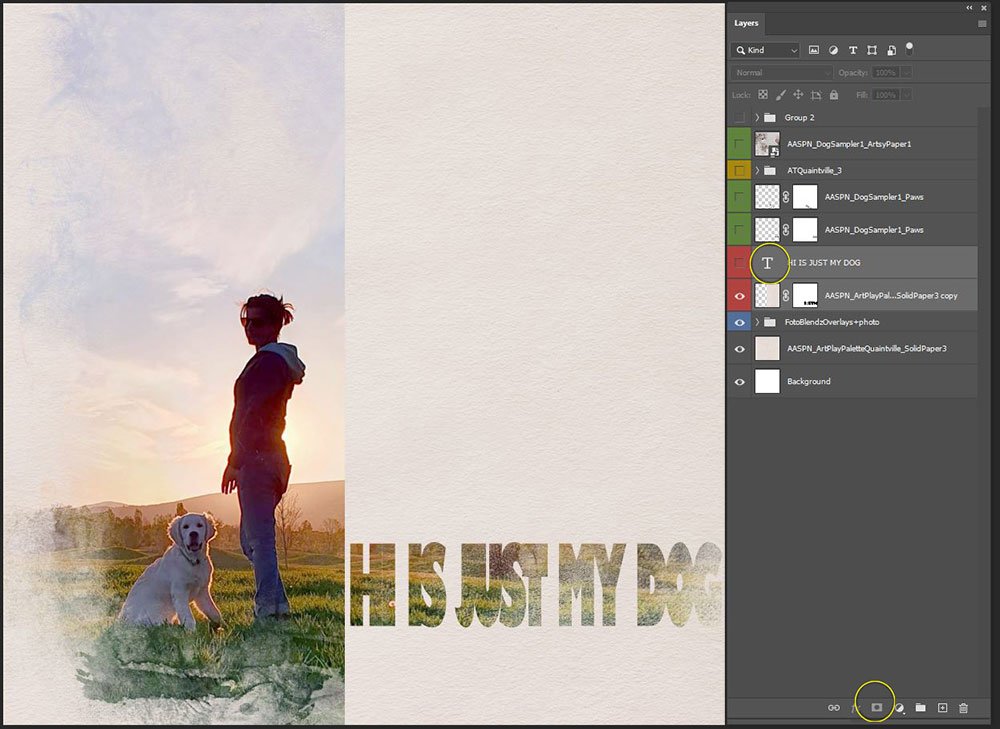
Use a selection and inverted mask to create a cut-out text effect.
- Select the text layer in the Layers Panel.
- Hold down the CTRL/CMD key on your keyboard and CLICK on the ‘T’ thumbnail in the Layers Panel.
- Notice the dotted line ‘selection’ created around the characters of your text.
- Turn off the visibility of the text layer.
- Select the Solid Paper (or Color Fill) layer in the Layers Panel.
- Hold down the ALT/OPT key and click on the ‘Add Layer Mask’ icon in the Layers Panel.
- This creates a ‘cut out’ of the text in the Solid Paper (or Color Fill) layer to reveal the underlying photo.
4. Introduce More Text
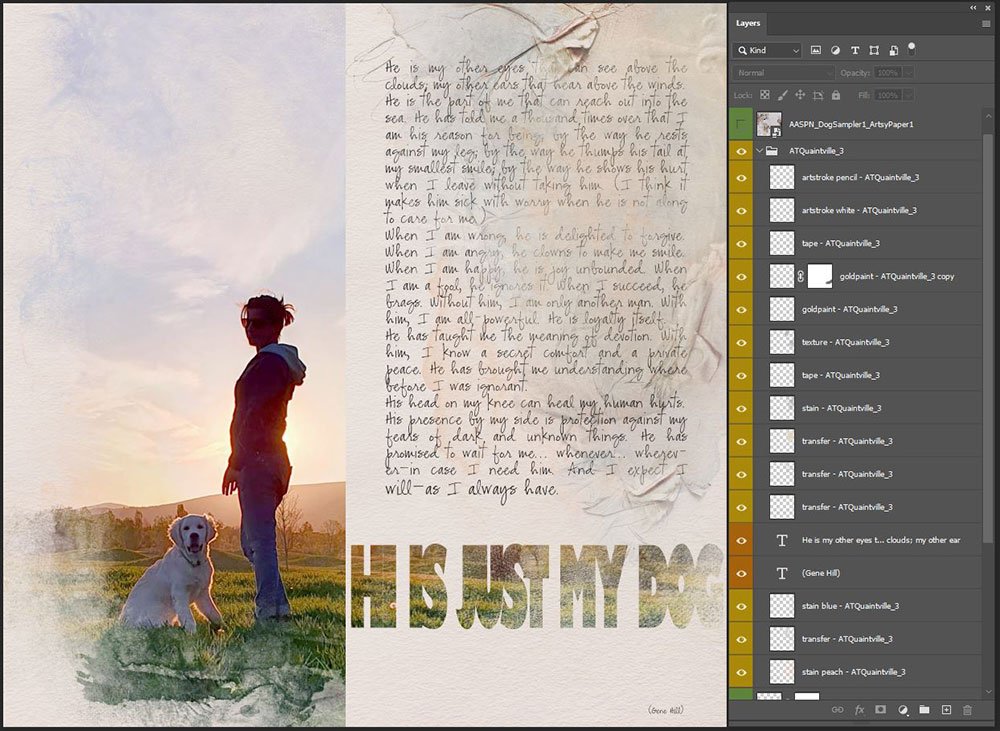
Add a larger body of text to provide context and combine with an ArtsyTransfer to add visual interest.
- Open 3.psd file from ArtsyTransfers Quaintville.
- Move all the layers onto your layout, above the Solid Paper (or Color Fill) layer, and group the layers if preferred.
- Copy and paste text between the layers of the chosen ArtsyTransfer.
- Modify the Transfers layers as preferred to support your layout design.
5. Embellish Your Design
Place additional elements to enhance visual interest.
- Introduce elements from Dog Sampler No. 1 to support THEME.
- Blend an Artsy Paper over the design to create subtle visual interest.
- BookTextures No. 1 contributes TEXTURE.
- Go to Layer> Layer Styles> Bevel & Emboss/Drop Shadow to enhance the cut-out text effect with dimension.
Summary
Add a cool Embossed Cut-Out Text Effect to add formality to your layout design which.
- Adds TENSION to your overall design.
- Creates a fun title.
- Provides the opportunity to add more text.
WE INVITE YOU TO:
- See Artsy Digital Scrapbooking Titles.
- Peruse or post to the [aalogo] Gallery.
- Watch Fabulous Titles and Blending Modes Video.
- Take TitleSmarts self-paced class.
- Visit the Anna Aspnes Designs store at Oscraps.
Always appreciate ideas for title art and love the embossed look! Thanks, Margo, for the inspirational blog!
Hungarian Translation:
Mindig értékelje a címművészet ötleteit, és imádja a domborított megjelenést! Köszönöm, Margo, az inspiráló blogért!
Thanks for the kind words, Marnie! … and special thanks for your constant attention to translation!!
Köszönöm a kedves szavakat, Marnie! … és külön köszönöm a fordítással kapcsolatos folyamatos figyelmességét!!