
Today, Margo is sharing how to Create a Charcoal Pencil Photo Effect.
This tutorial is for Adobe Photoshop Users only.
Create a Charcoal Pencil Photo Effect
Introduction
Transform your photos into pencil drawings using filters in Photoshop.
- Elevate your photos.
- Add visual interest to your artistry and scrapbooking layouts
1. Select Photo
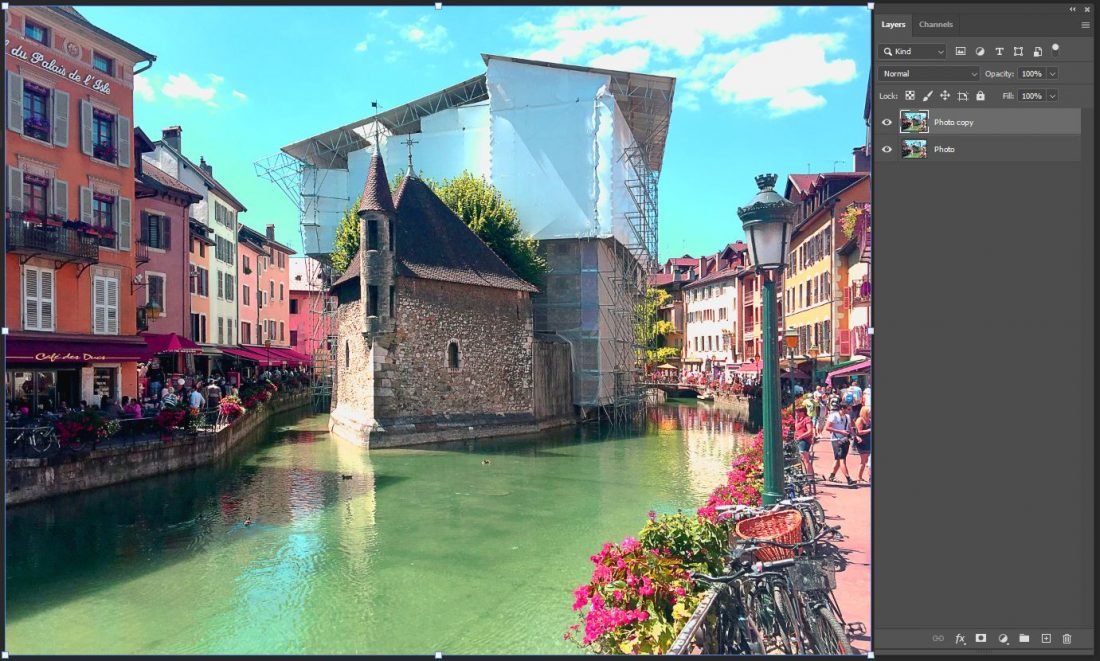
Open the image into Photoshop and duplicate.
- Go to File> Open, select photos and click OK.
- Double click the ‘Background‘ layer in the Layers Panel to unlock.
- Duplicate the image layer by dragging the photo layer to the New Layer icon in the Layers Panel.
- You can also use the CTRL/CMD + J keyboard shortcut.
2. Photo Copy Layer
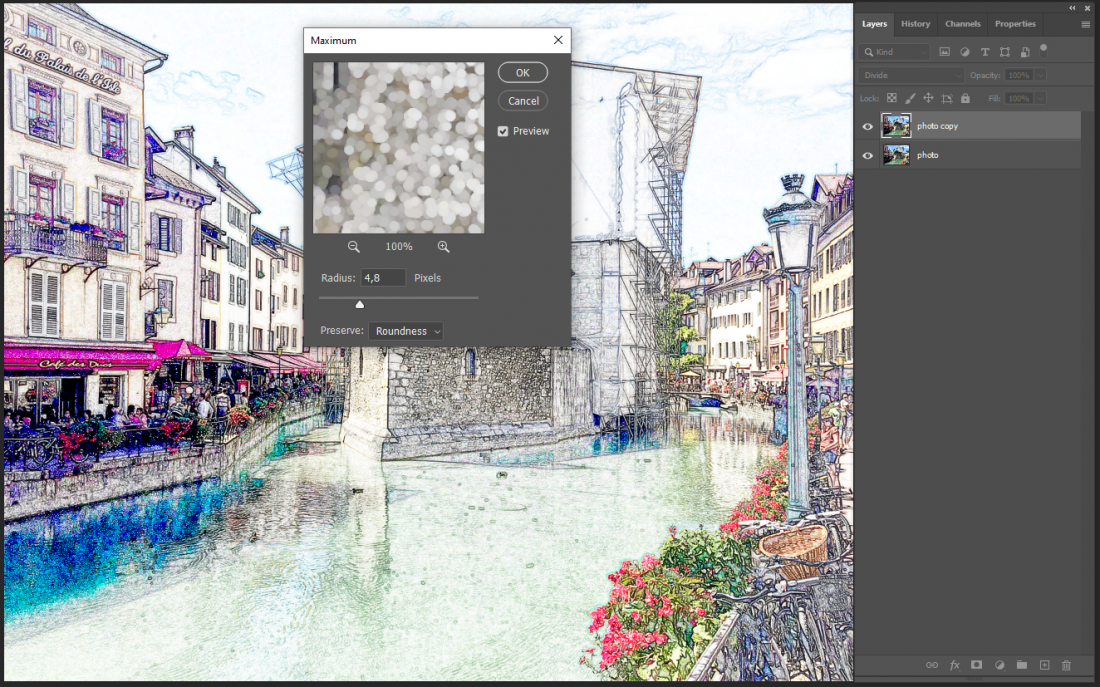
Apply a Divide Blending Mode and Maximum Filter to the Photo Copy Layer.
- Select the duplicate or ‘photo copy‘ layer in the Layers Panel.
- Apply the Divide Blending Mode from the top of the Layers Panel.
- Click on ‘Normal‘ and select Divide from the drop-down menu.
- Go to Filter> Other> Maximum.
- Set the values according to the image below to determine the thickness of the pencil lines.
Note. Experiment with the values to find the best fit for your photos.
3. Create a Composite Layer
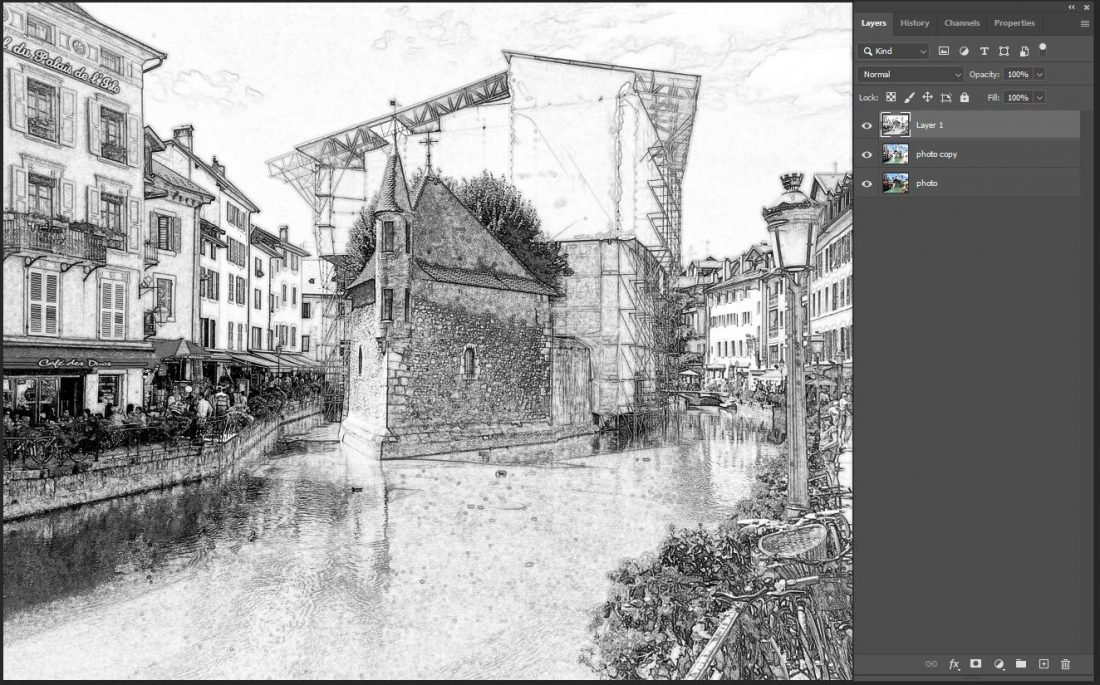
Create a composite layer which merges the 2 photo layers above the original photo layer.
- Select the layers in the Layers Panel.
- Press CTRL/CMD + ALT/OPT + SHIFT + E.
- Notice the single merged layer appear above the original photo layer.
- Blur the image slightly via Filter> Blur> Gaussian Blur and adjust the Radius value as preferred.
- Go to Image> Adjustments> Desaturate (or press SHIFT + CTRL/CMD + U) to create a black and white image.
4. Apply Artistic Filter
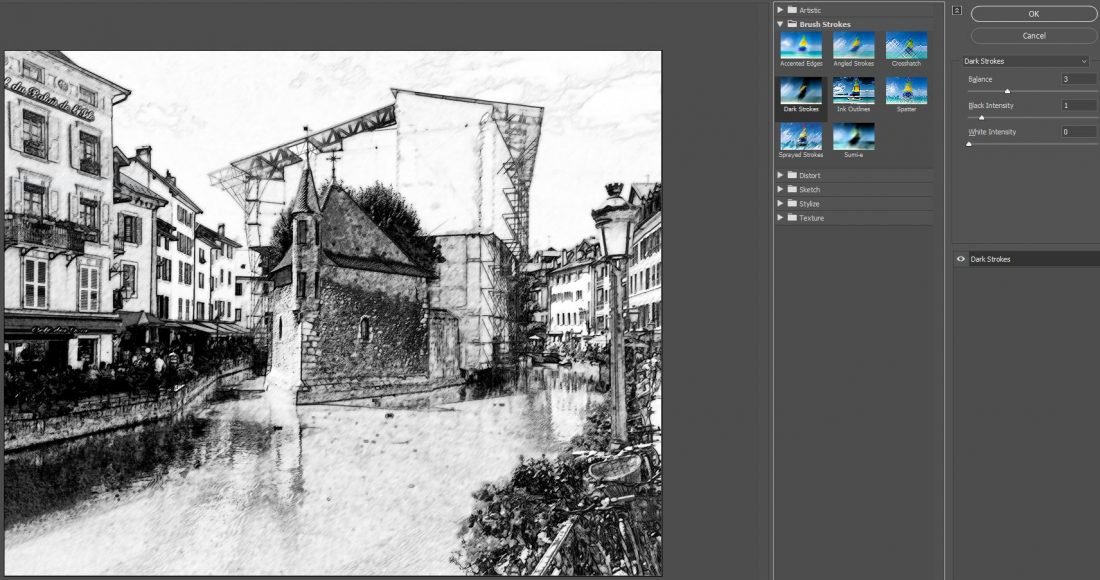
Elevate the image further using Dark Strokes Artistic Filter.
- Go to Filter> Filter Gallery> Brush Strokes> Dark Strokes.
- Set the values using the image below or to your preference.
Note. Values will be dependent on your unique image.
5. Save Pencil Effect Image.
Save the image as a .jpg image.
- Go to File> Save As.
- Select the .jpf file extension option.
- Enter the name of your choice.
- Click SAVE.
- Choose Quality of 8-10
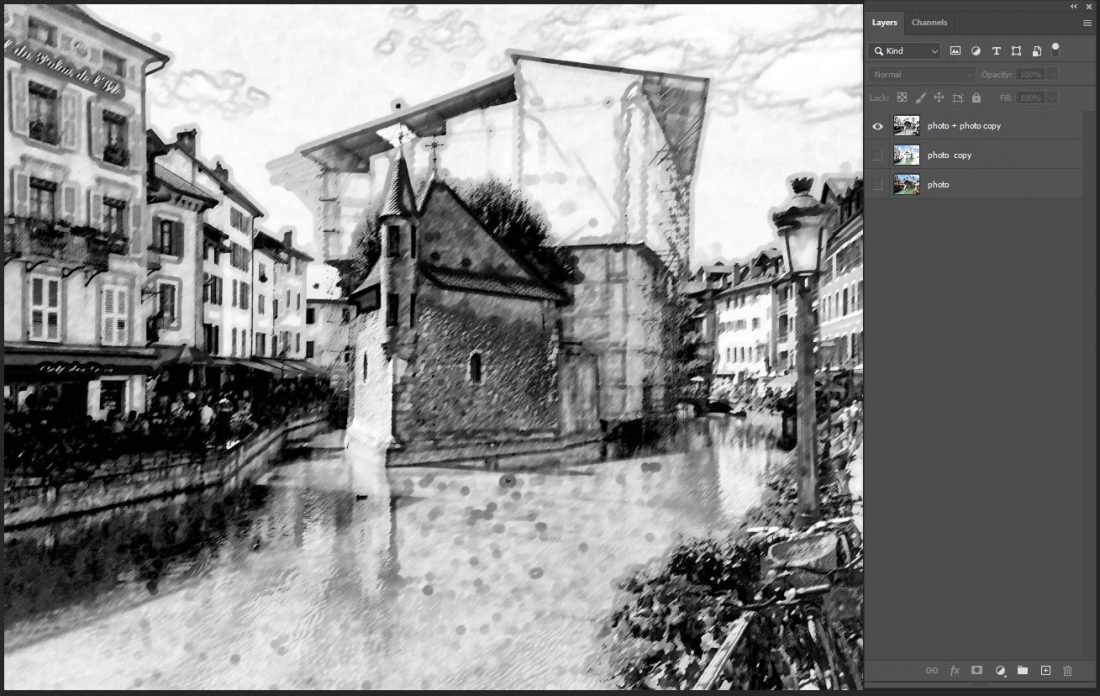
6. Create Artistry
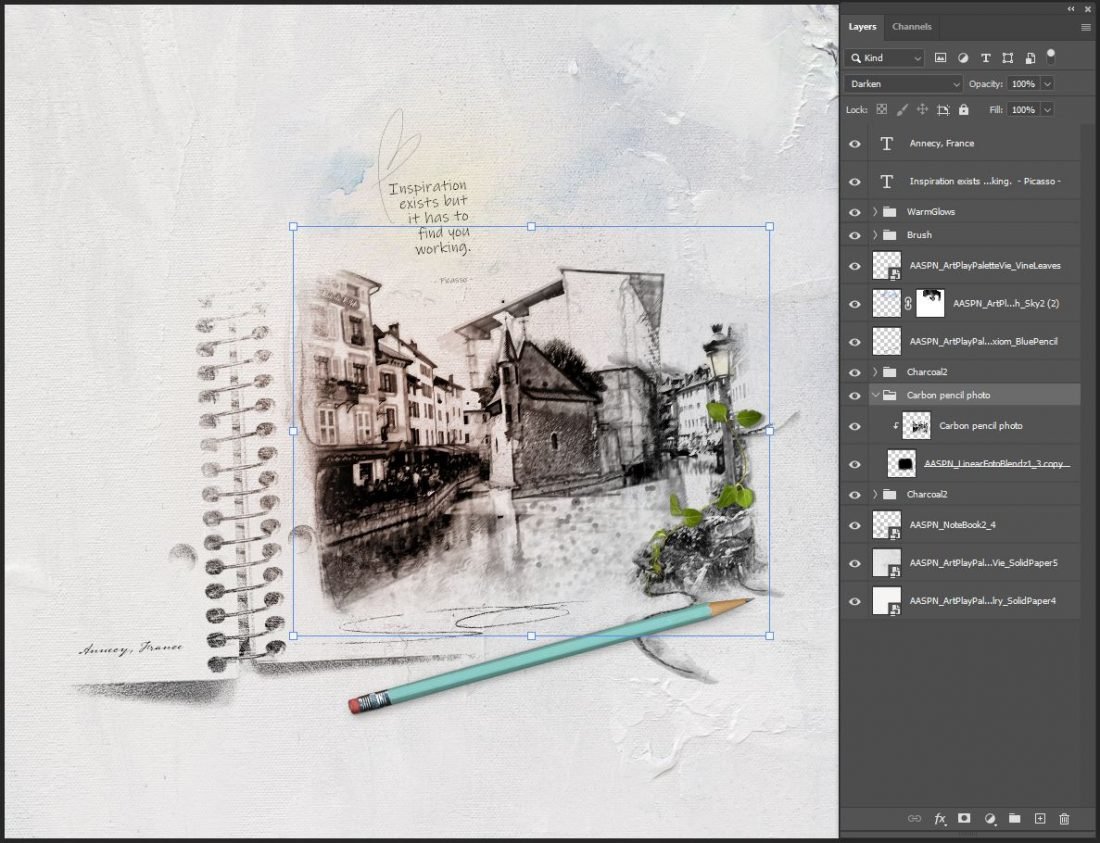
Support your edited image with DigitalART supplies to create a photo artistry layout.
- Go to File> New and create a 12 X 12 inch New Layout at 300 DPI.
- Choose an Artsy Paper as a layout foundation or build your own using a Solid Paper and Transfers/Overlays.
- Open and move your saved .jpg file onto the layout using the Move Tool from the Tools Panel.
- Embellish with elements such as more BrushSets, MultiMedia and FotoGlows
Summary
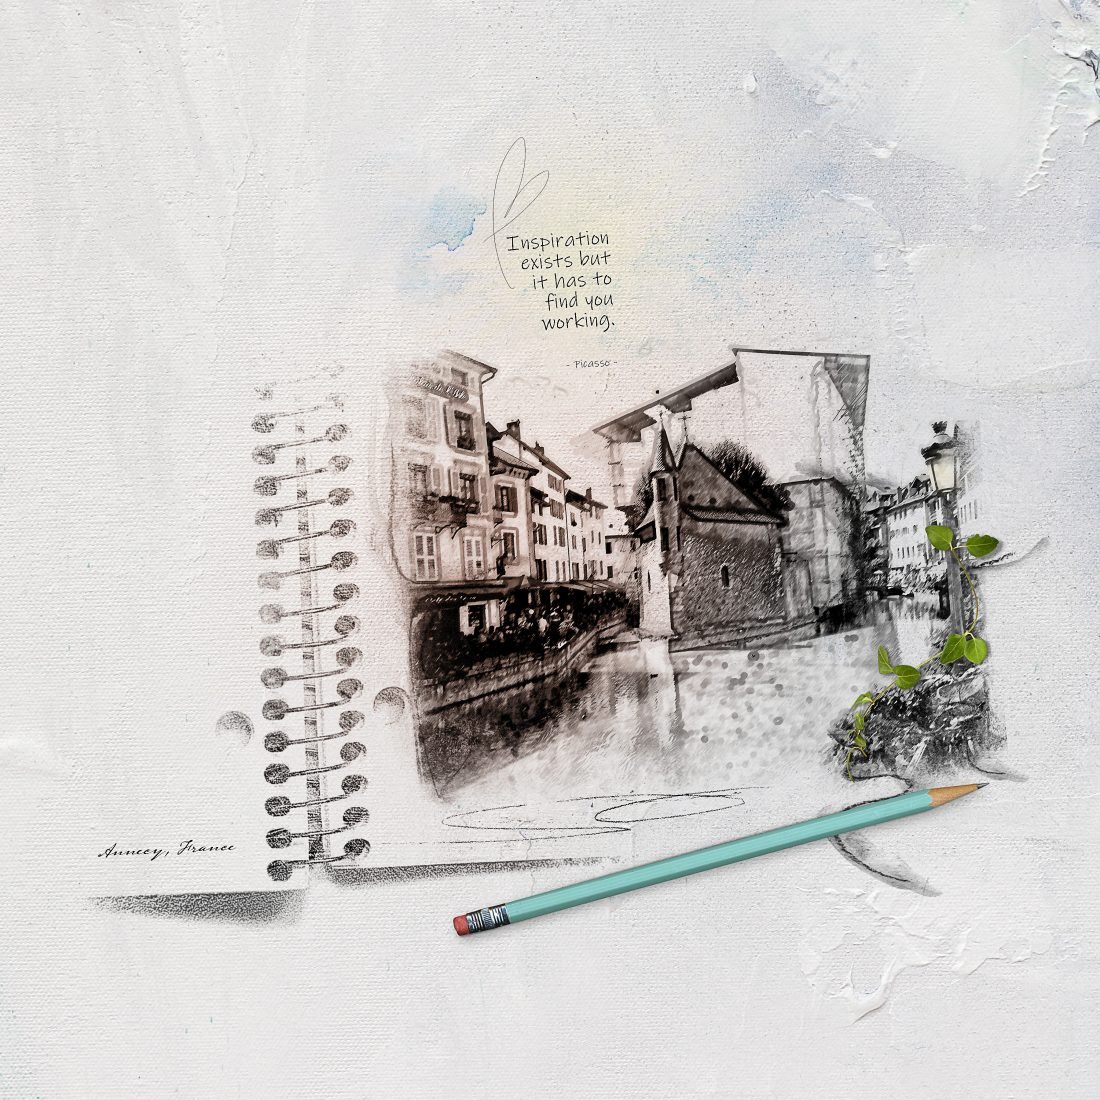
Use Filters in Photoshop to transform your photos into art.
This can:
- Make your photos part of the artistry.
- Inject mood into the design to better tell the visual story.
- Elevate your Photoshop skills.
DigitalART Supplies
A complete list of DigitalART supplies can be found here.
See IMAGE No_7
Wonderful tutorial Margo! I really love how the charcoal pencil effect has made the architecture in your photography stand out proudly! So subtle and so beautiful! Thank you for sharing this – it is definitely a skill to add to my arsenal! xx
Yep!
Going to give this a try! Anna’s notebook brush makes a great companion for your artistic sketch! Thanks so much for the delightful inspiration, Margo!
Megpróbálom ezt megtenni! Anna notebook ecset kiváló társa művészi vázlatának! Nagyon köszönöm a kellemes inspirációt, Margo!
Weee! Looking forward to seeing Marnie.
Beautiful effect!
Yes. So fun seeing it in the gallery – Thanks for sharing your talents with us Margo.
Thank you for sharing the tutorial Margo! I’ve never made a sketch that way .. but it’s so easy and I’m sure I will use it …
Yes to learning something new 🙂
Great tutorial Margo, thank you.
Happy you enjoyed. Thanks for sharing.
Loved this tutorial. Thanks so much.
Thanks for sharing 🙂 Always awesome to receive feedback.
I love your work and the tutorial but I have Photoshop Elements. There is no Divide blending mode. Does anyone know if there is a work around to create the same effect in Elements? Thanks!
This is one of the limitations of Photoshop Elements. You could try leaving it out or experiment with the other filters you do have. Hope this helps.